Invitations
Overview
Workspace invitations and roles are closely connected. Before you can invite someone to your workspace, you need to understand roles—because every invitation assigns the invited user to a specific role that determines their permissions. You can learn more about roles here
Think of it this way:
- First, you define what roles exist in your workspace and what each role can do
- Then, you invite users and assign them to these roles
- Finally, invited users accept and gain access based on their assigned role
This guide walks through both concepts to help you effectively manage workspace access.
Important: Prism invitations work only for users who are already registered on Prism. Users must create an account before they can receive and accept workspace invitations.
Understanding Workspace Roles
Roles are the foundation of workspace invitations. When you invite someone, you're essentially saying "join my workspace with these specific permissions." Let's understand what roles are available and how to create custom ones.
How Roles Work
A workspace has users assigned to different roles that control what they can access and do. Each role is a collection of permissions that determines exactly what actions a user can perform.
The Admin Role
Every workspace comes with a built-in Admin role that has full privileges—complete control over workspace settings, computations, assets, invitations, and role management. The workspace creator is automatically assigned this role.
Here are the permissions included in the Admin role:
update— Modify workspace settingsread— View workspace informationdelete— Delete workspace resourcesenable/disable— Control workspace featuresmanage_role— Create and modify rolesadd_role_users/remove_role_users— Assign users to rolesview_role_users— See who has which rolescreate_cvms/remove_cvms— Manage Confidential VMscreate_computation— Set up new computations
This comprehensive set of permissions gives admins complete control over the workspace—which is exactly what you need as a workspace creator, but often too much access for other team members you'll invite.
Why Custom Roles Matter for Invitations
However, not everyone you invite needs full administrative access. When inviting team members, you'll typically want to assign them roles with more specific, limited permissions. For example:
- A data scientist you invite should be able to create and run computations but shouldn't manage billing
- An auditor you invite needs read-only access to review computations
- An external partner you invite should only access specific projects
This is where custom roles become essential for your invitation workflow.
Viewing Available Roles
Navigate to the Workspace page to view all roles and their permissions:
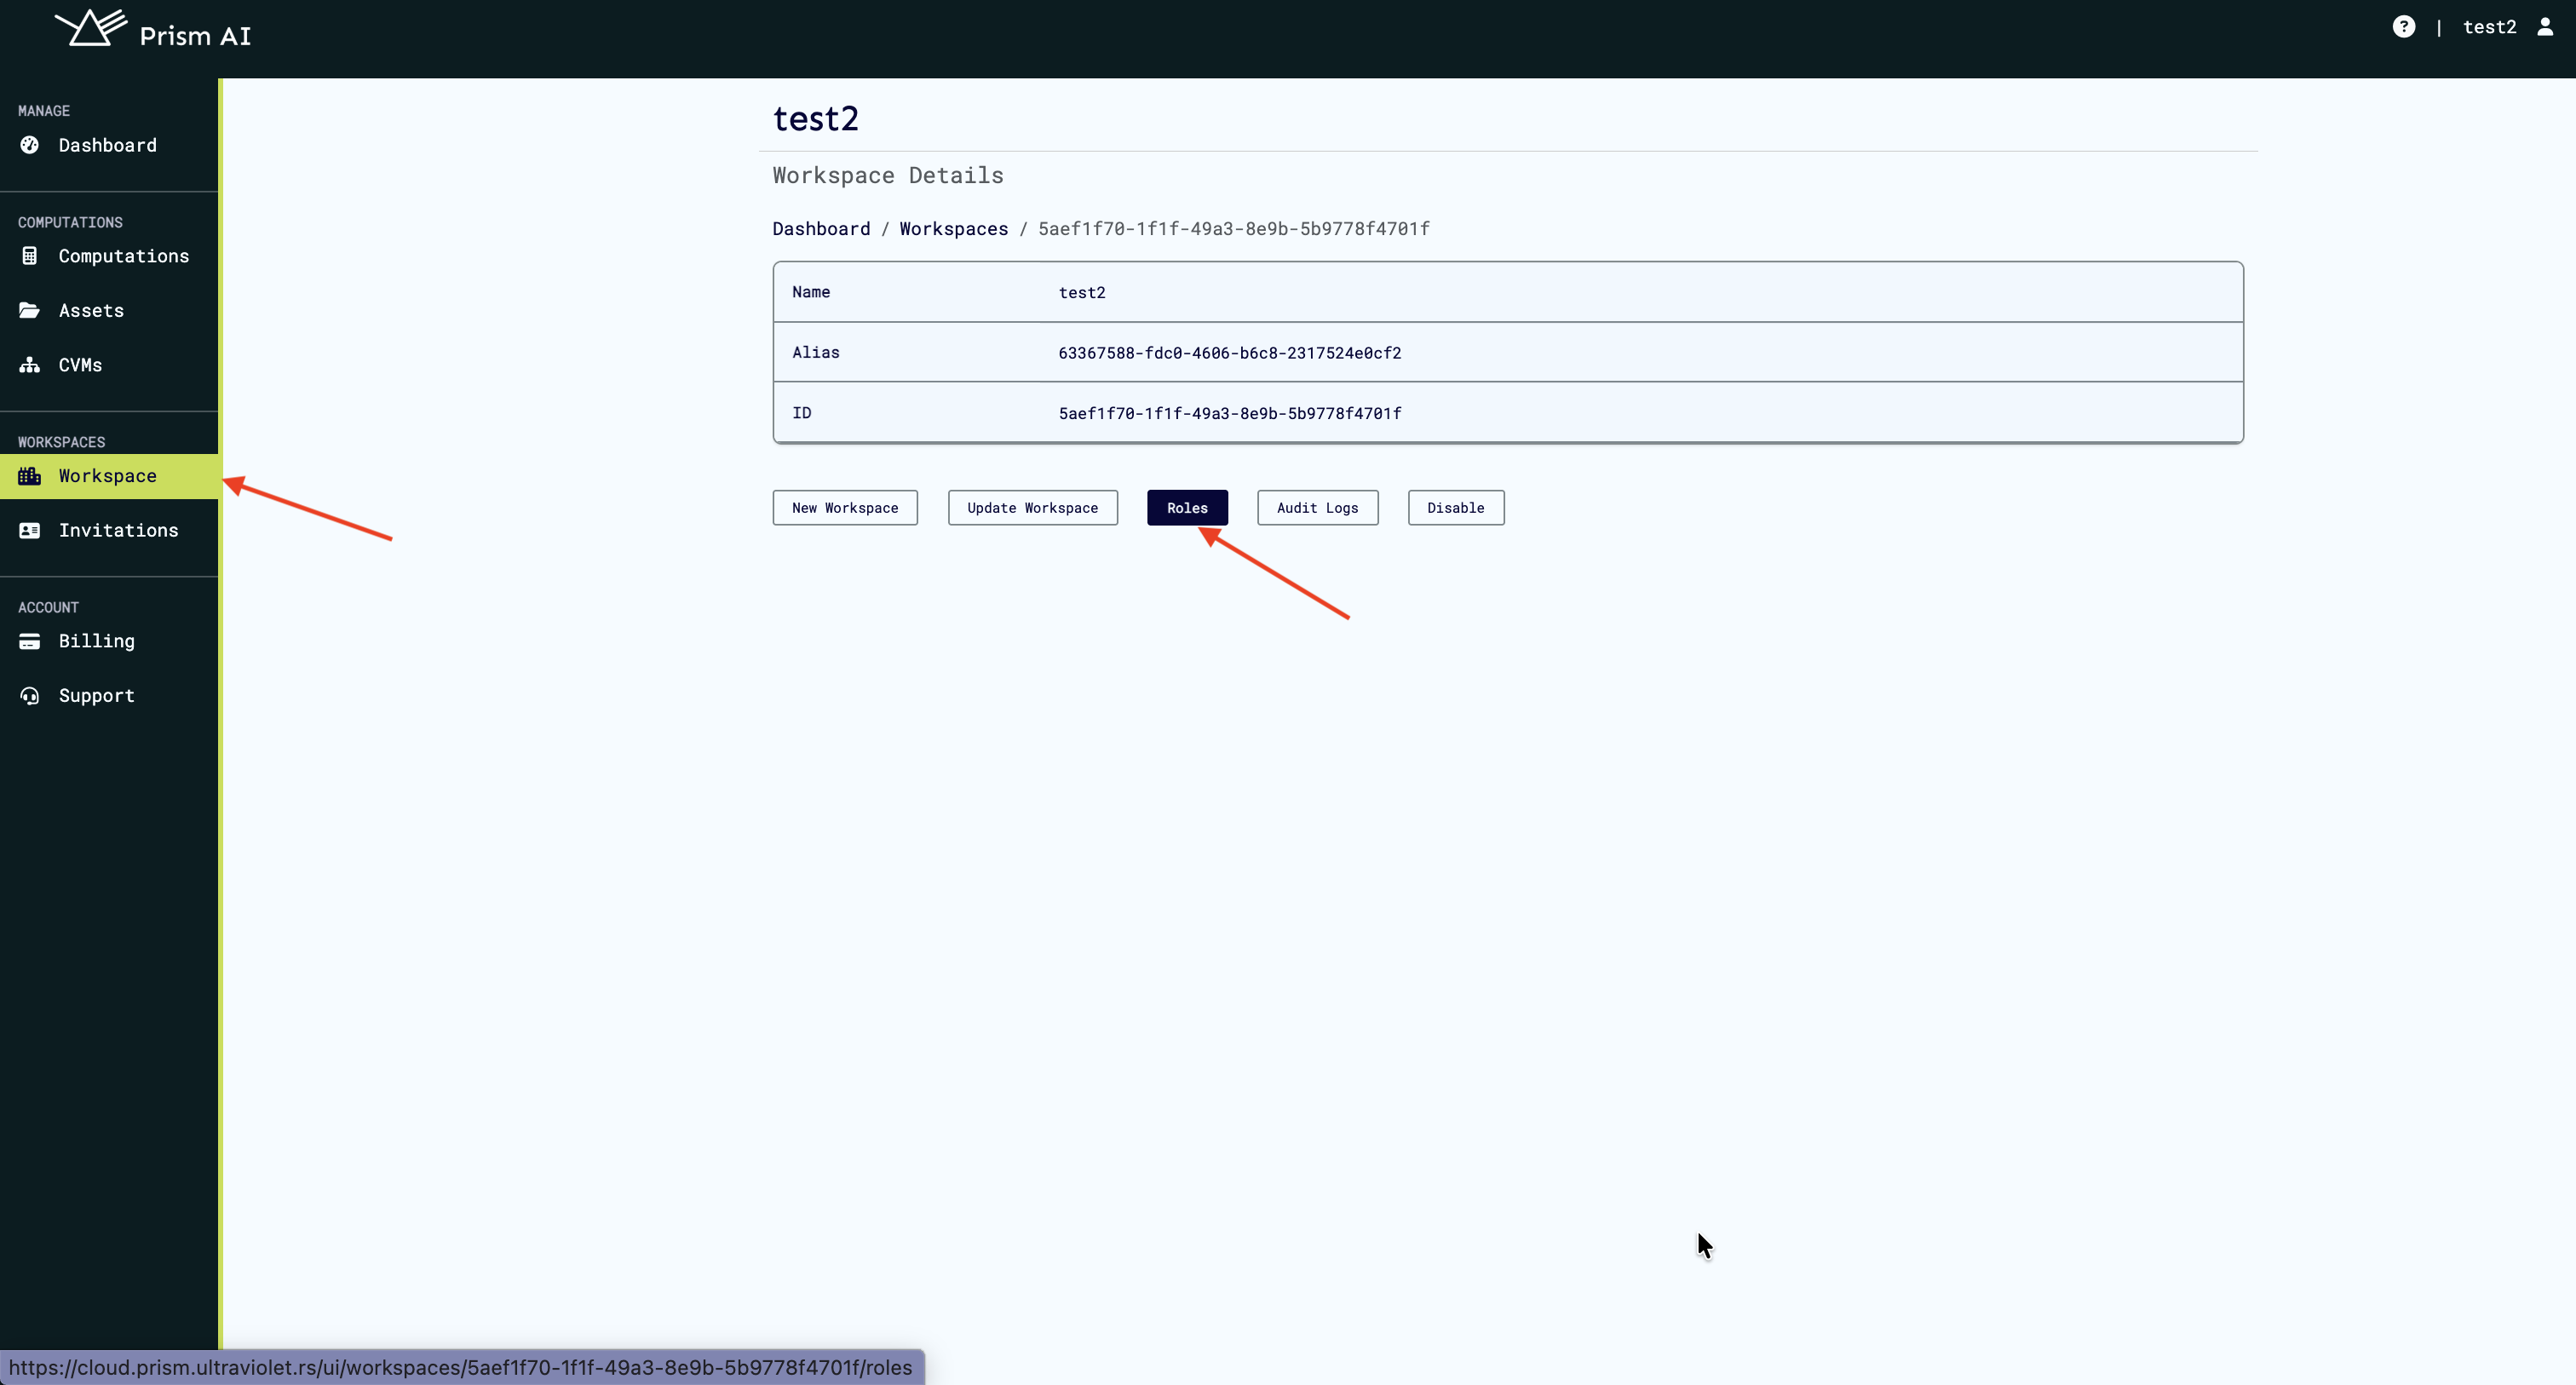
Each role defines a specific set of permissions that determine what users can do within the workspace. Prism provides default roles, but you have full flexibility to create and customize roles to match your exact needs.
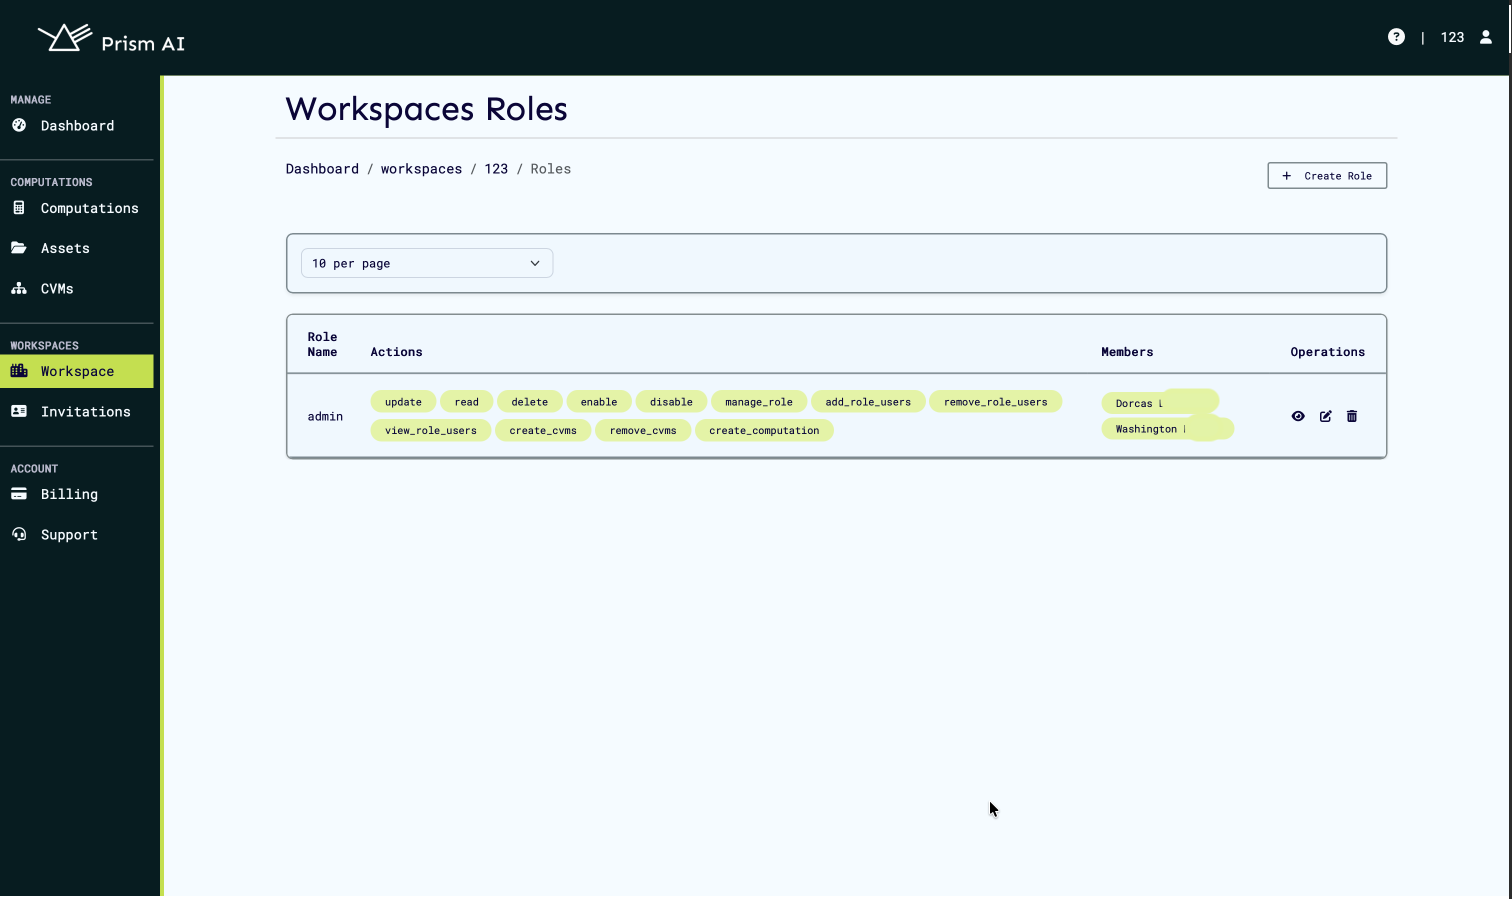
Currently, we only have the admin role. We will work on creating a custom role that we can assign and invite users in the next step.
Creating Custom Roles
You can create custom roles tailored to your workspace requirements:
-
Navigate to Roles in your workspace
-
Click Create Role
-
Define your custom role:
- Role Name — e.g., "Computation Manager","Data Analyst", "ML Engineer", "Auditor"
-
Add specific permissions as needed:
- Workspace management — View, edit, delete workspace settings
- Computation access — Create, run, view, or manage computations
- Asset management — Upload, link, modify algorithms and datasets
- Invitation controls — Send and manage workspace invitations
- Role administration — Create, assign, or modify roles
- Billing access — View or manage workspace billing
- CVM management — Provision or configure Confidential VMs
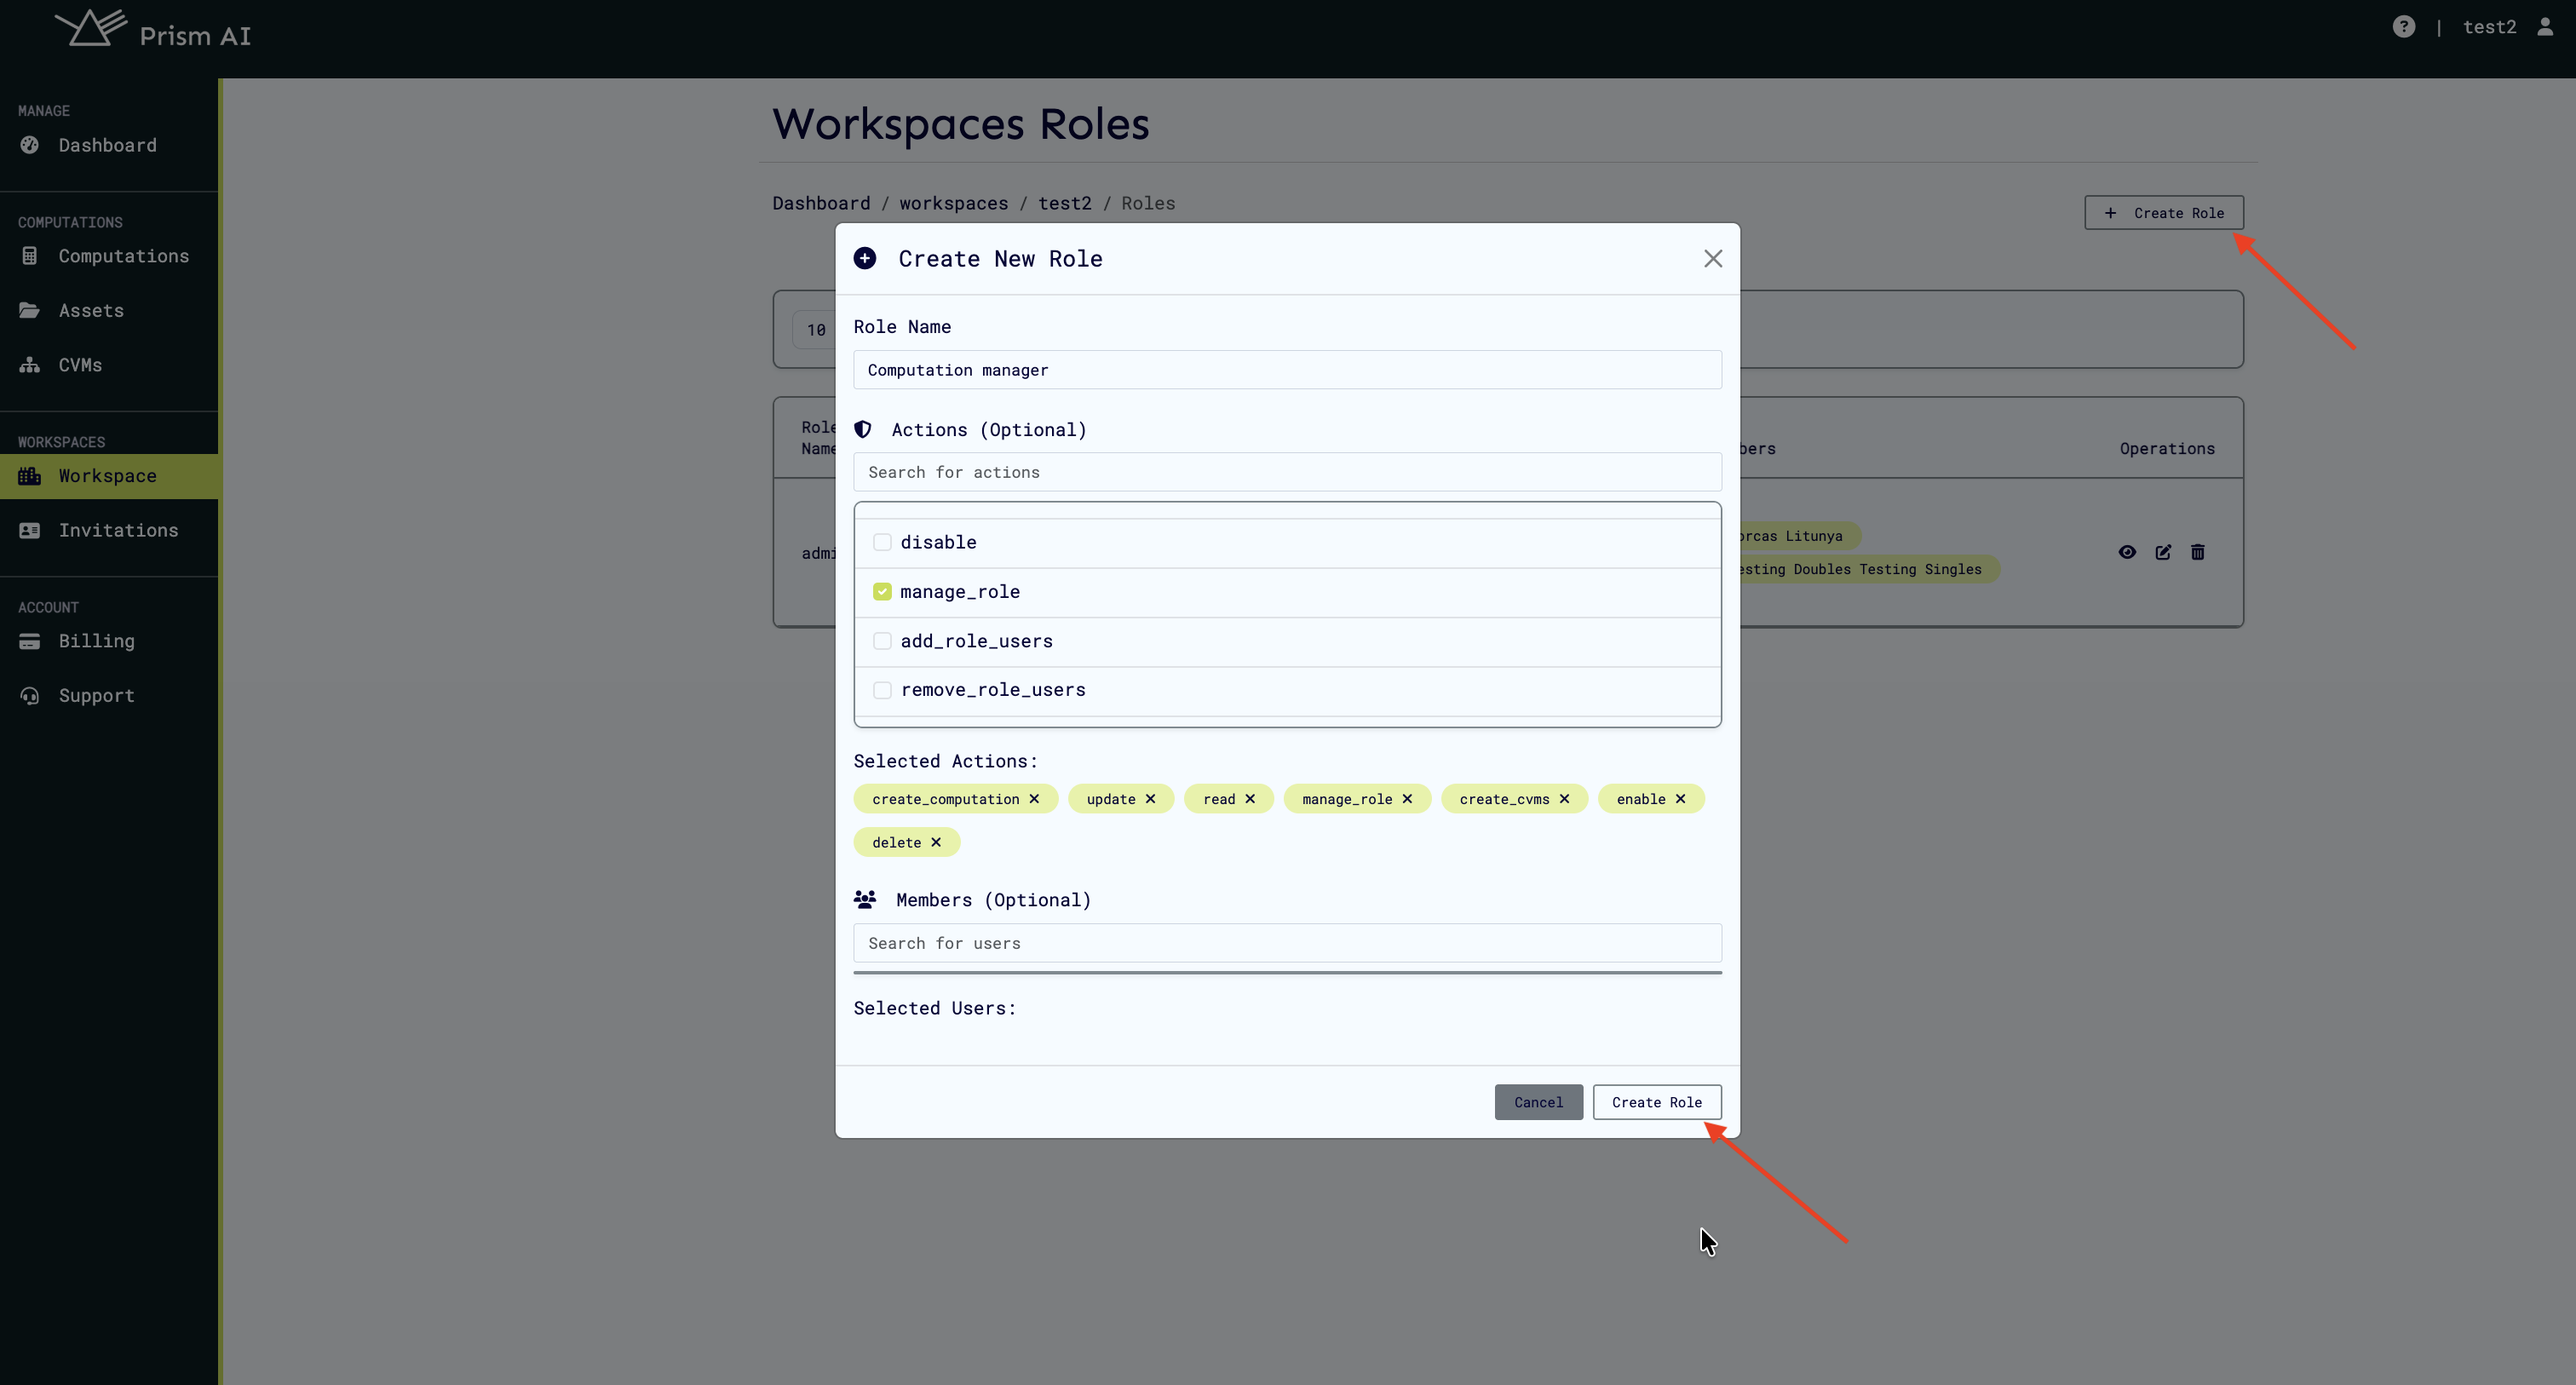
Each permission can be set independently, giving you precise control. For instance, you might grant someone the ability to run computations but not create new ones, or allow them to view assets without uploading new ones.
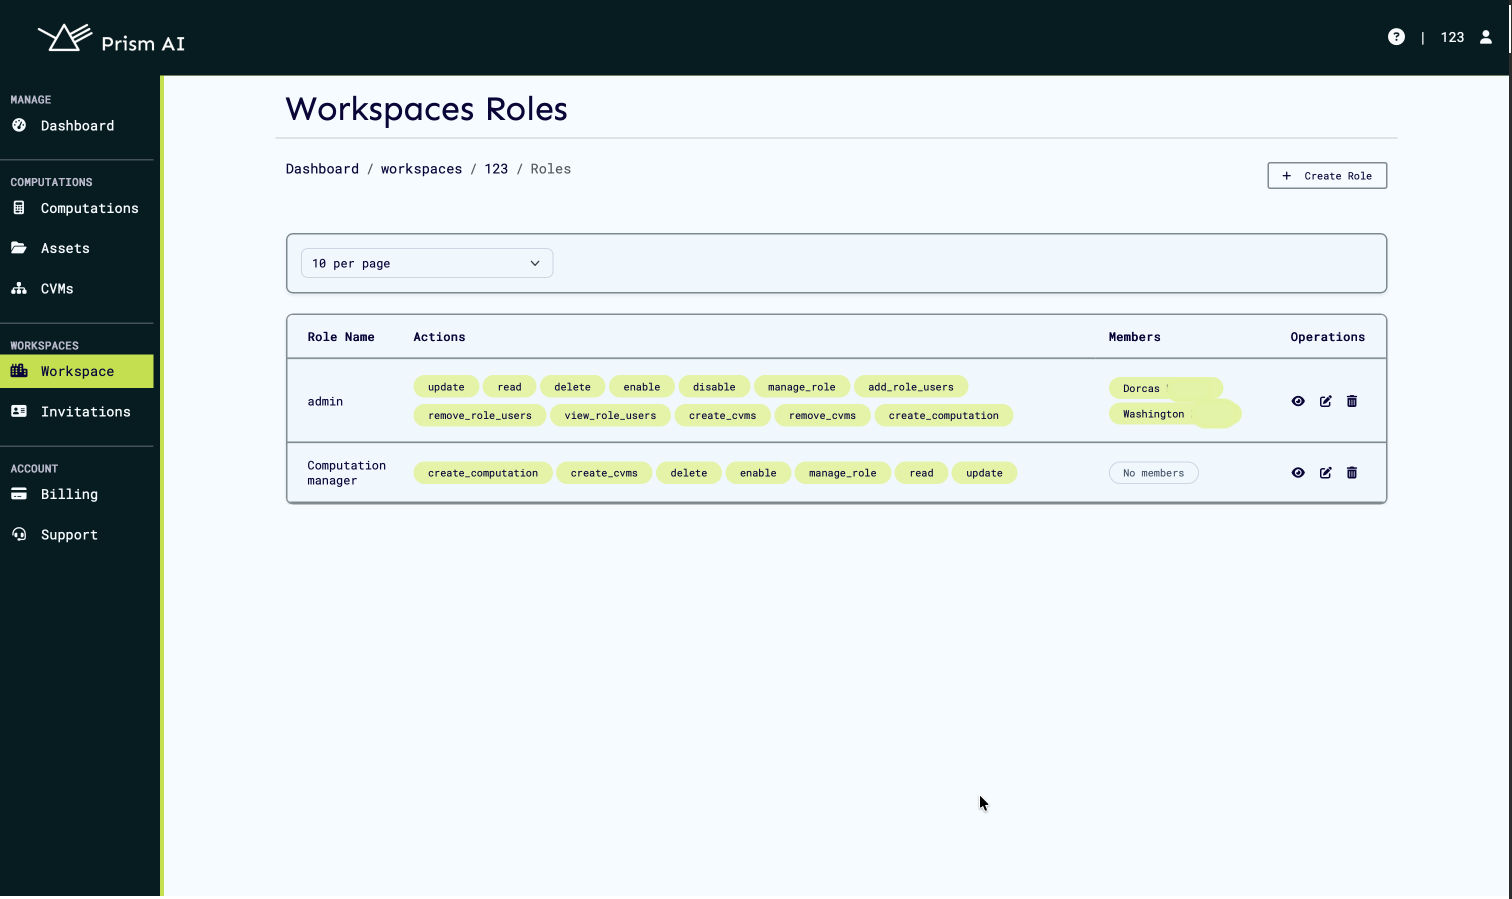
The new role will be created and added to the list of roles for the workspace.
Inviting Users to Your Workspace
Once you've set up the appropriate roles, you can invite users to collaborate in your workspace.
Overview
Workspace administrators can invite members to collaborate within their workspace. Invited users receive notifications and can choose to accept or decline invitations.
Important: Prism invitations work only for users who are already registered on Prism. Users must create an account before they can receive and accept workspace invitations.
Steps to Invite a User
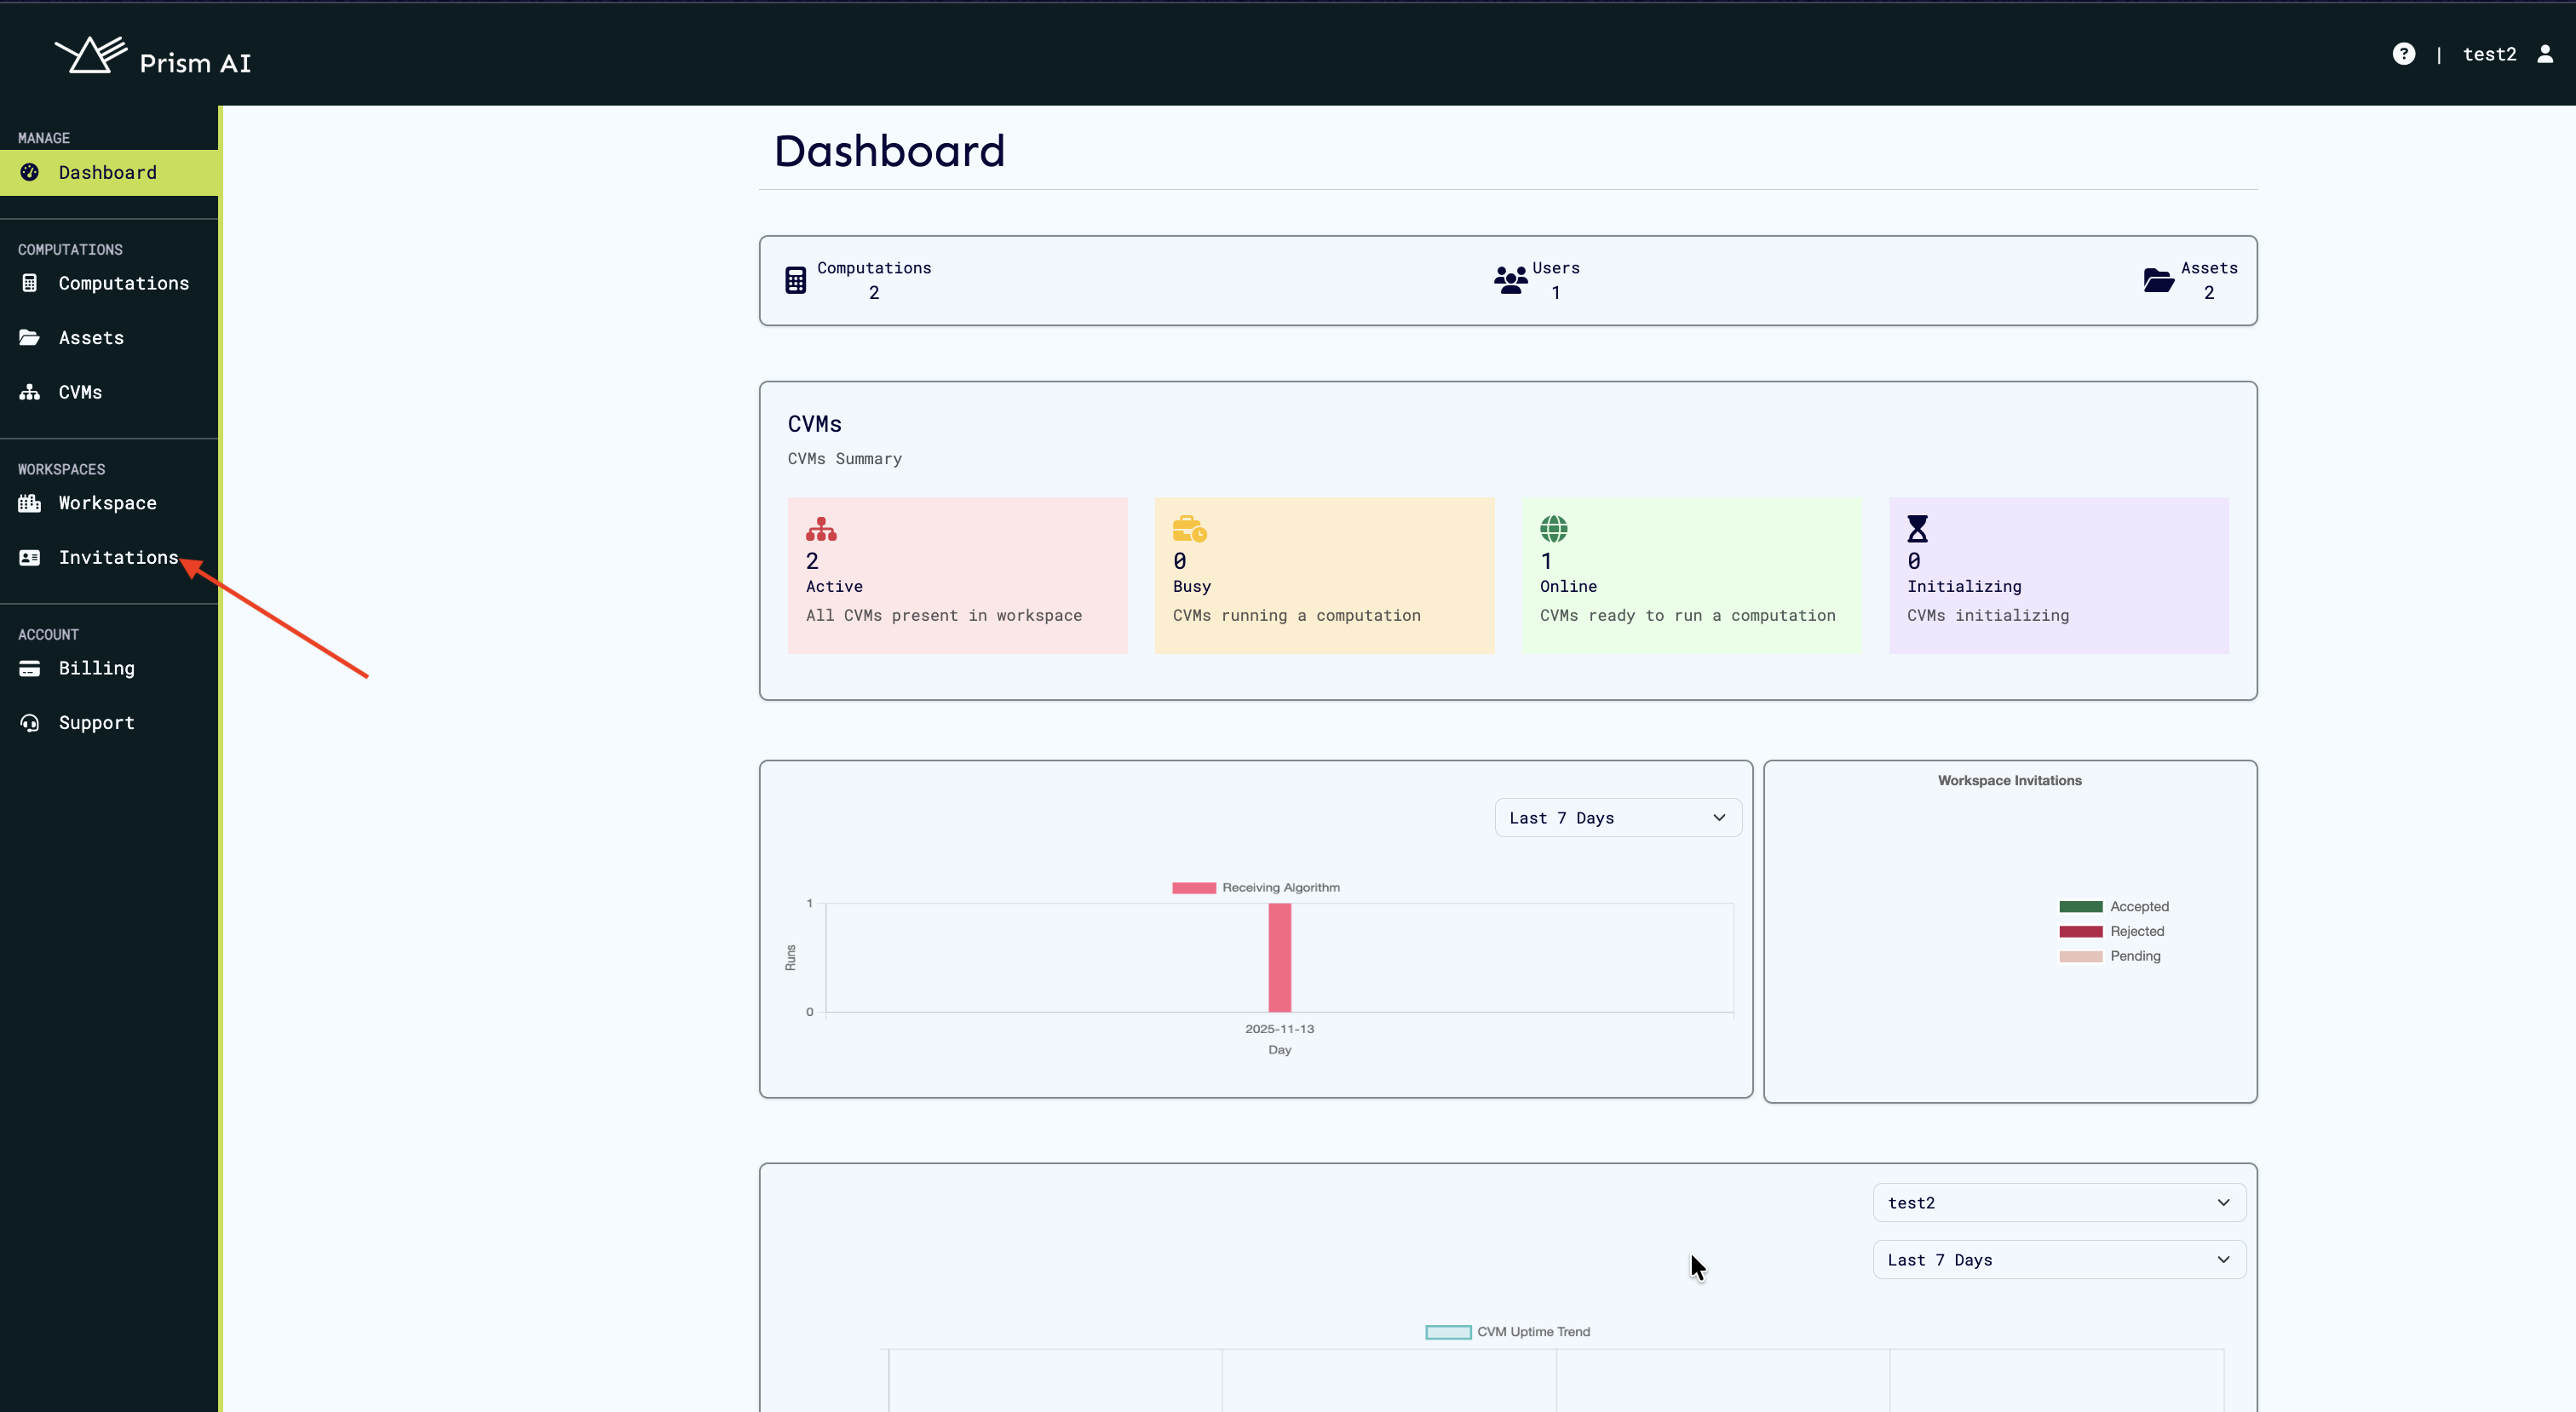
- Open the Invitations section from the sidebar
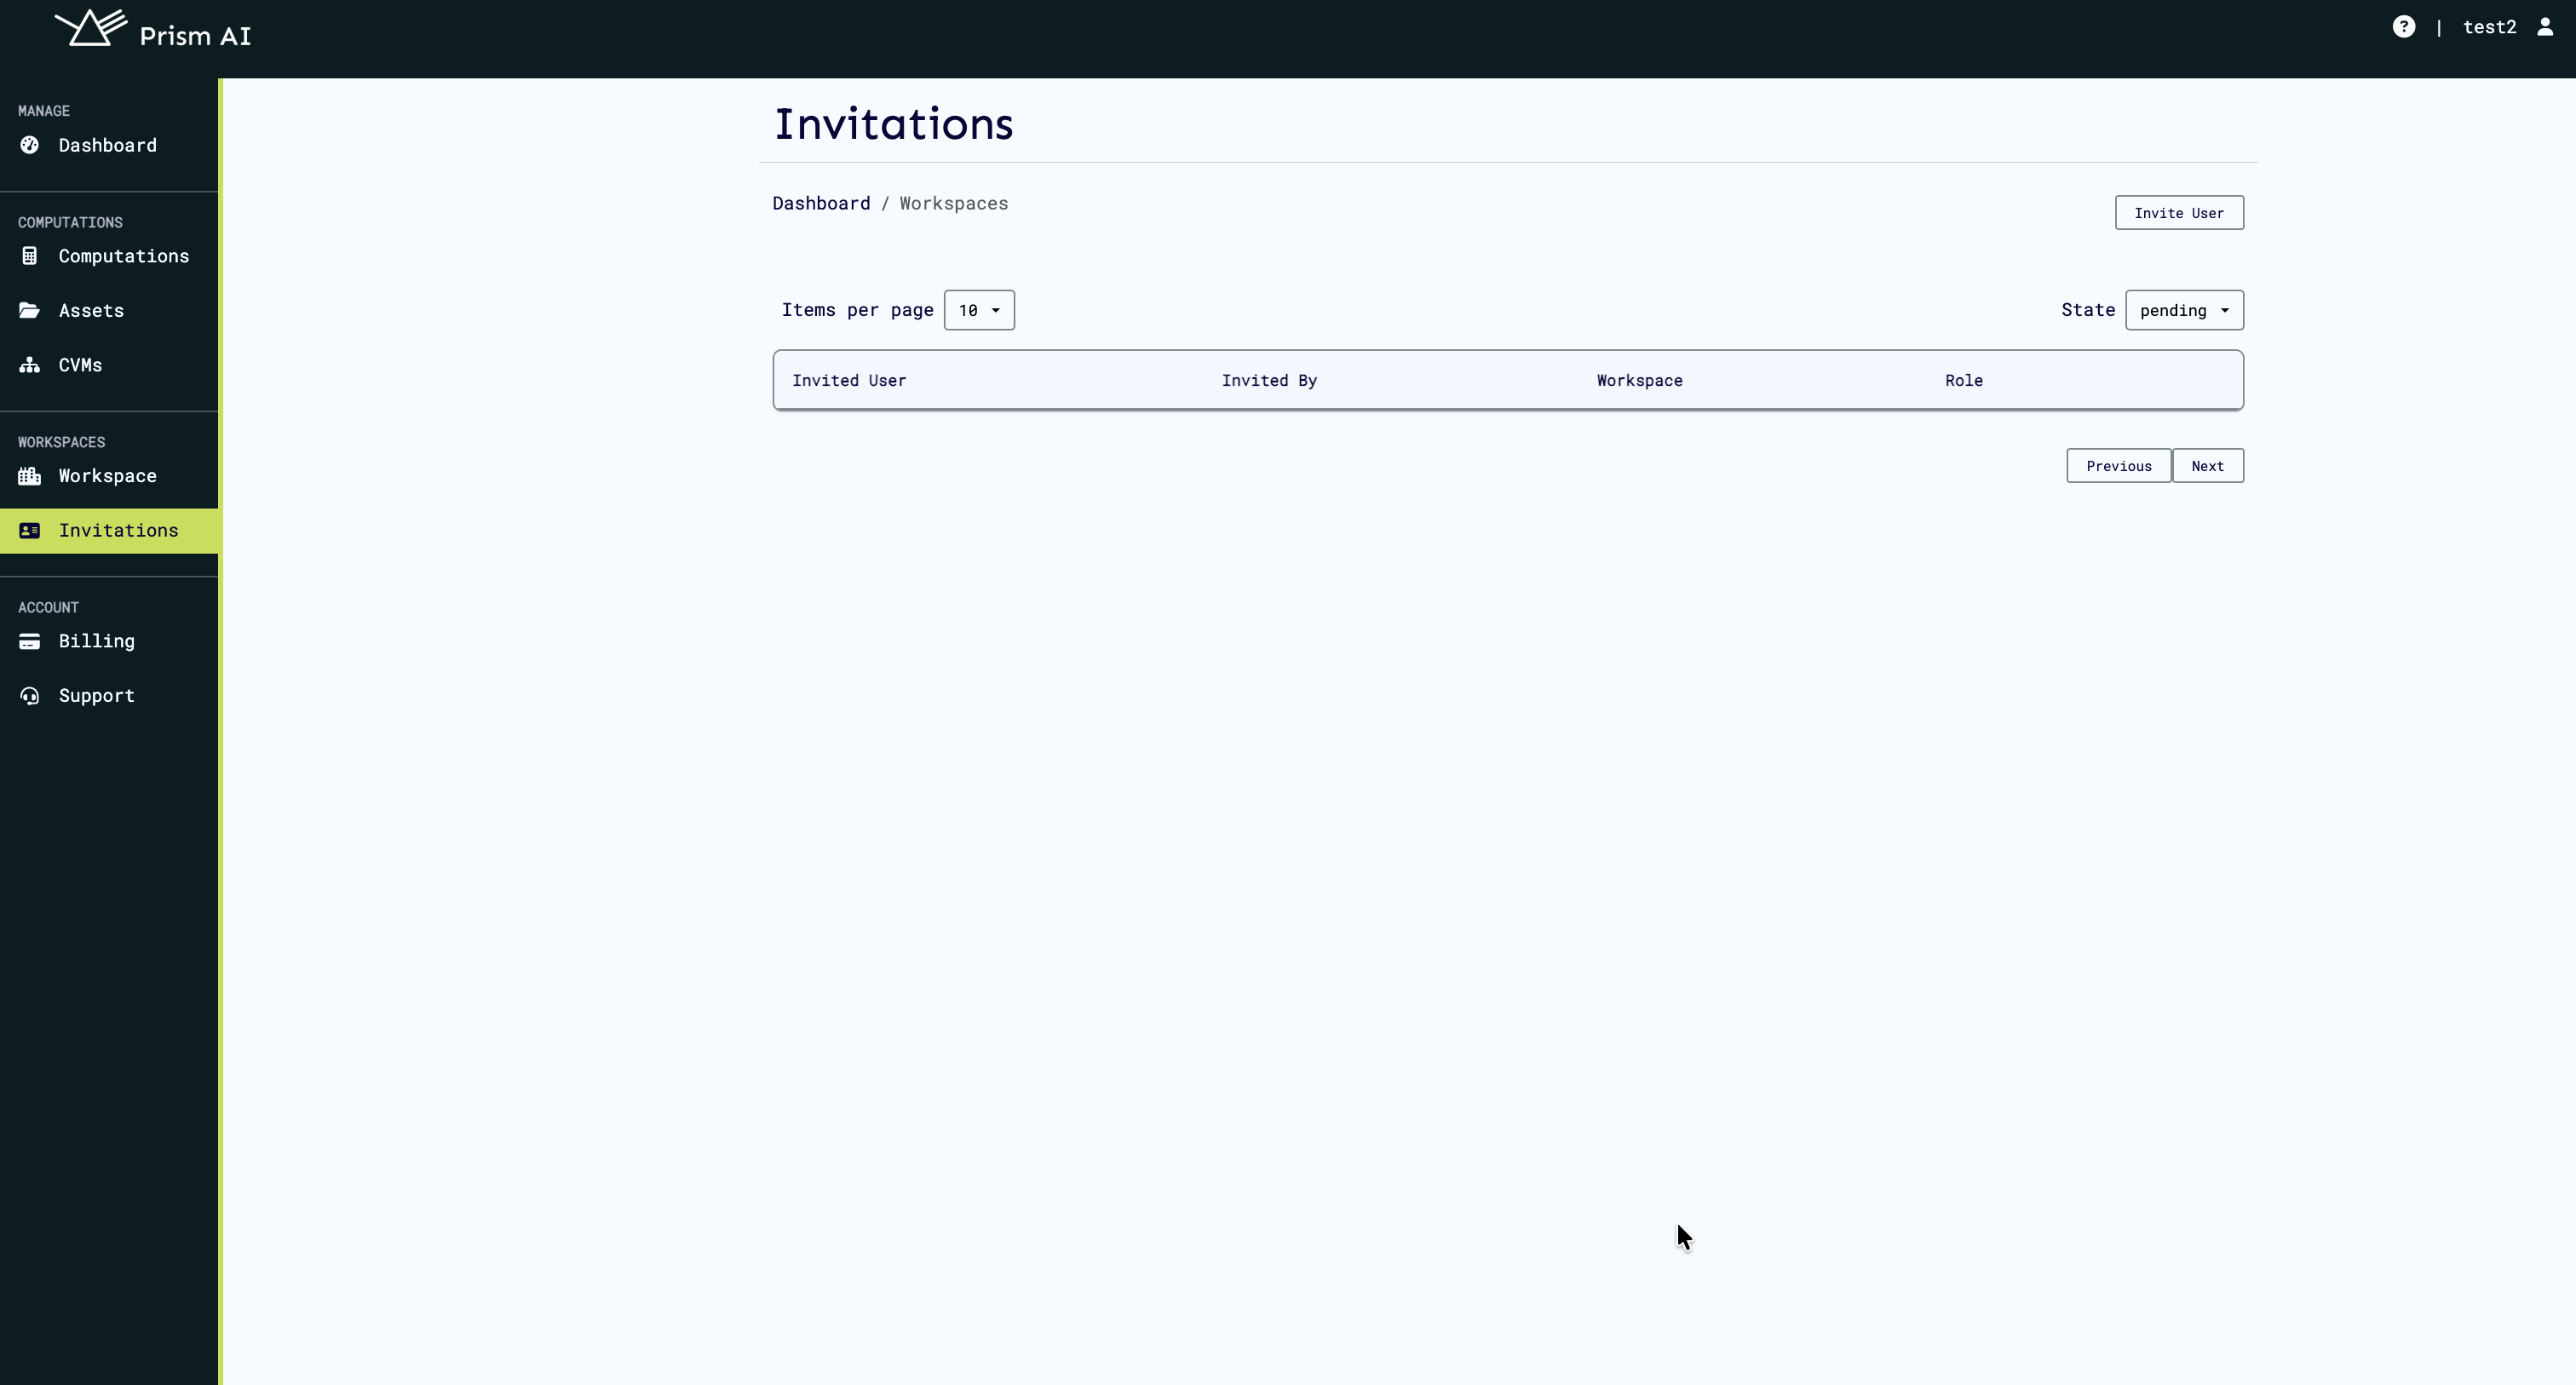
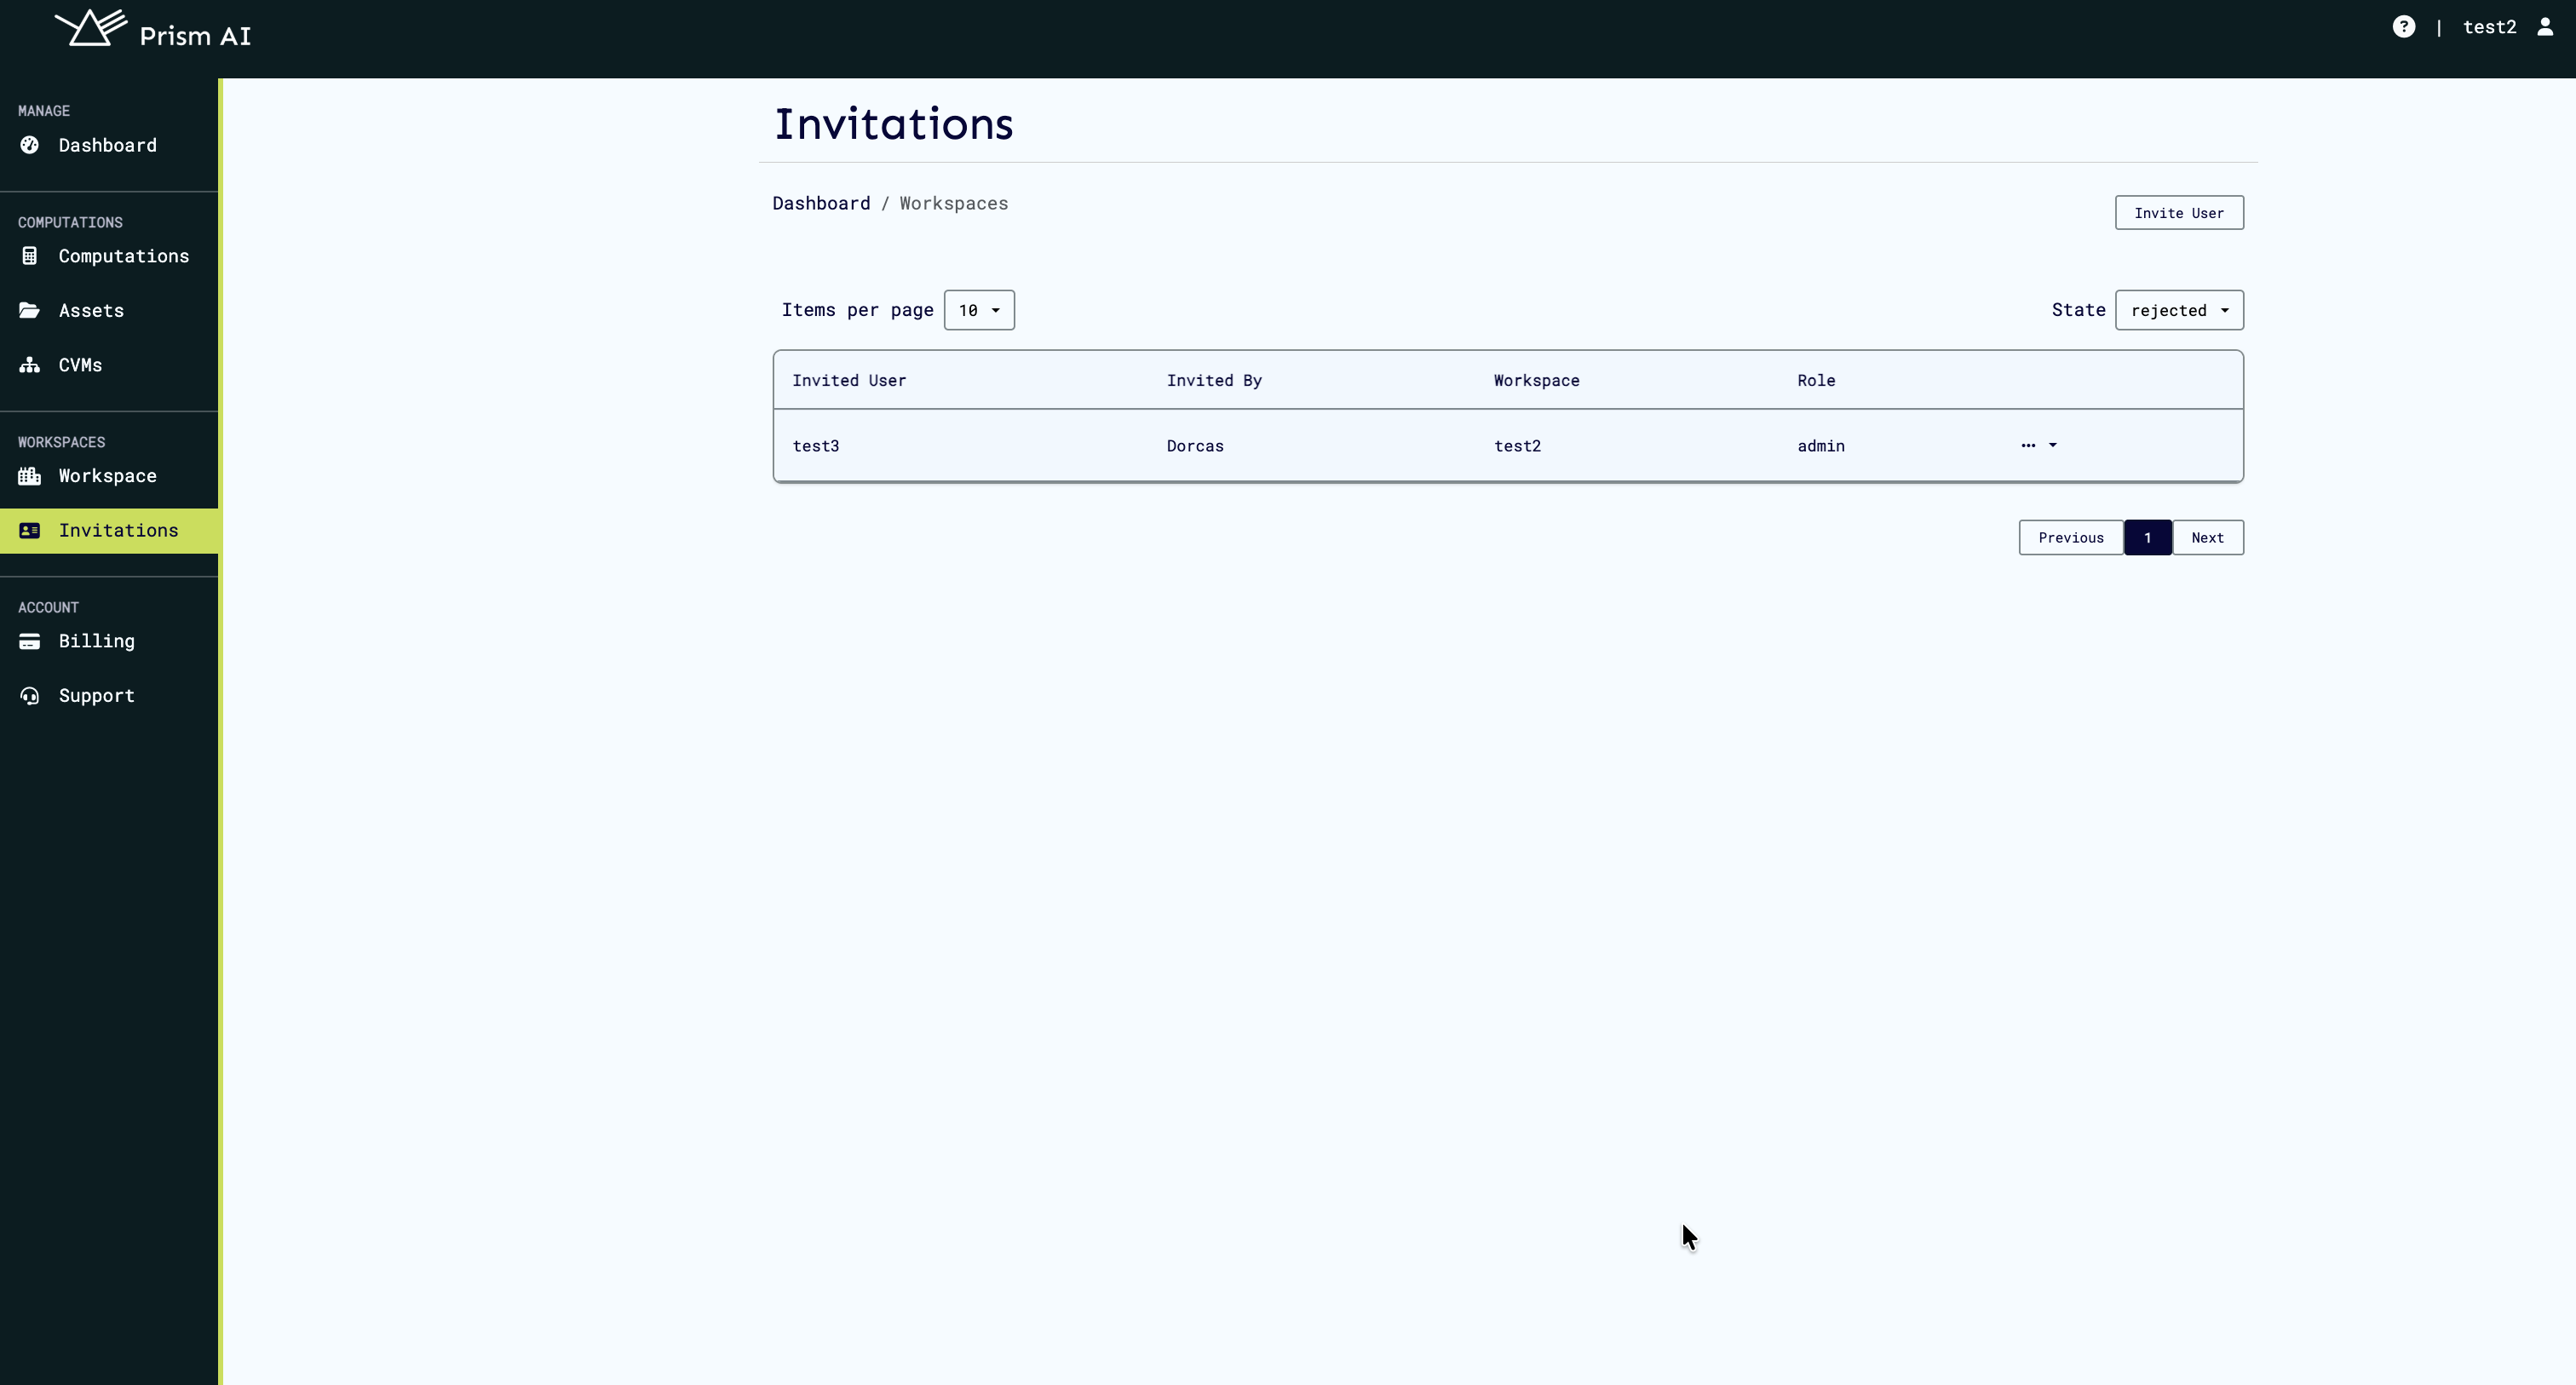
 The invitations page displays:
- All pending invitations — Users who haven't responded yet
- Invitation status — Pending, Accepted, or Rejected
- Action buttons — Options to resend or delete invitations
If you haven't sent any invitations yet, you'll see an empty state:
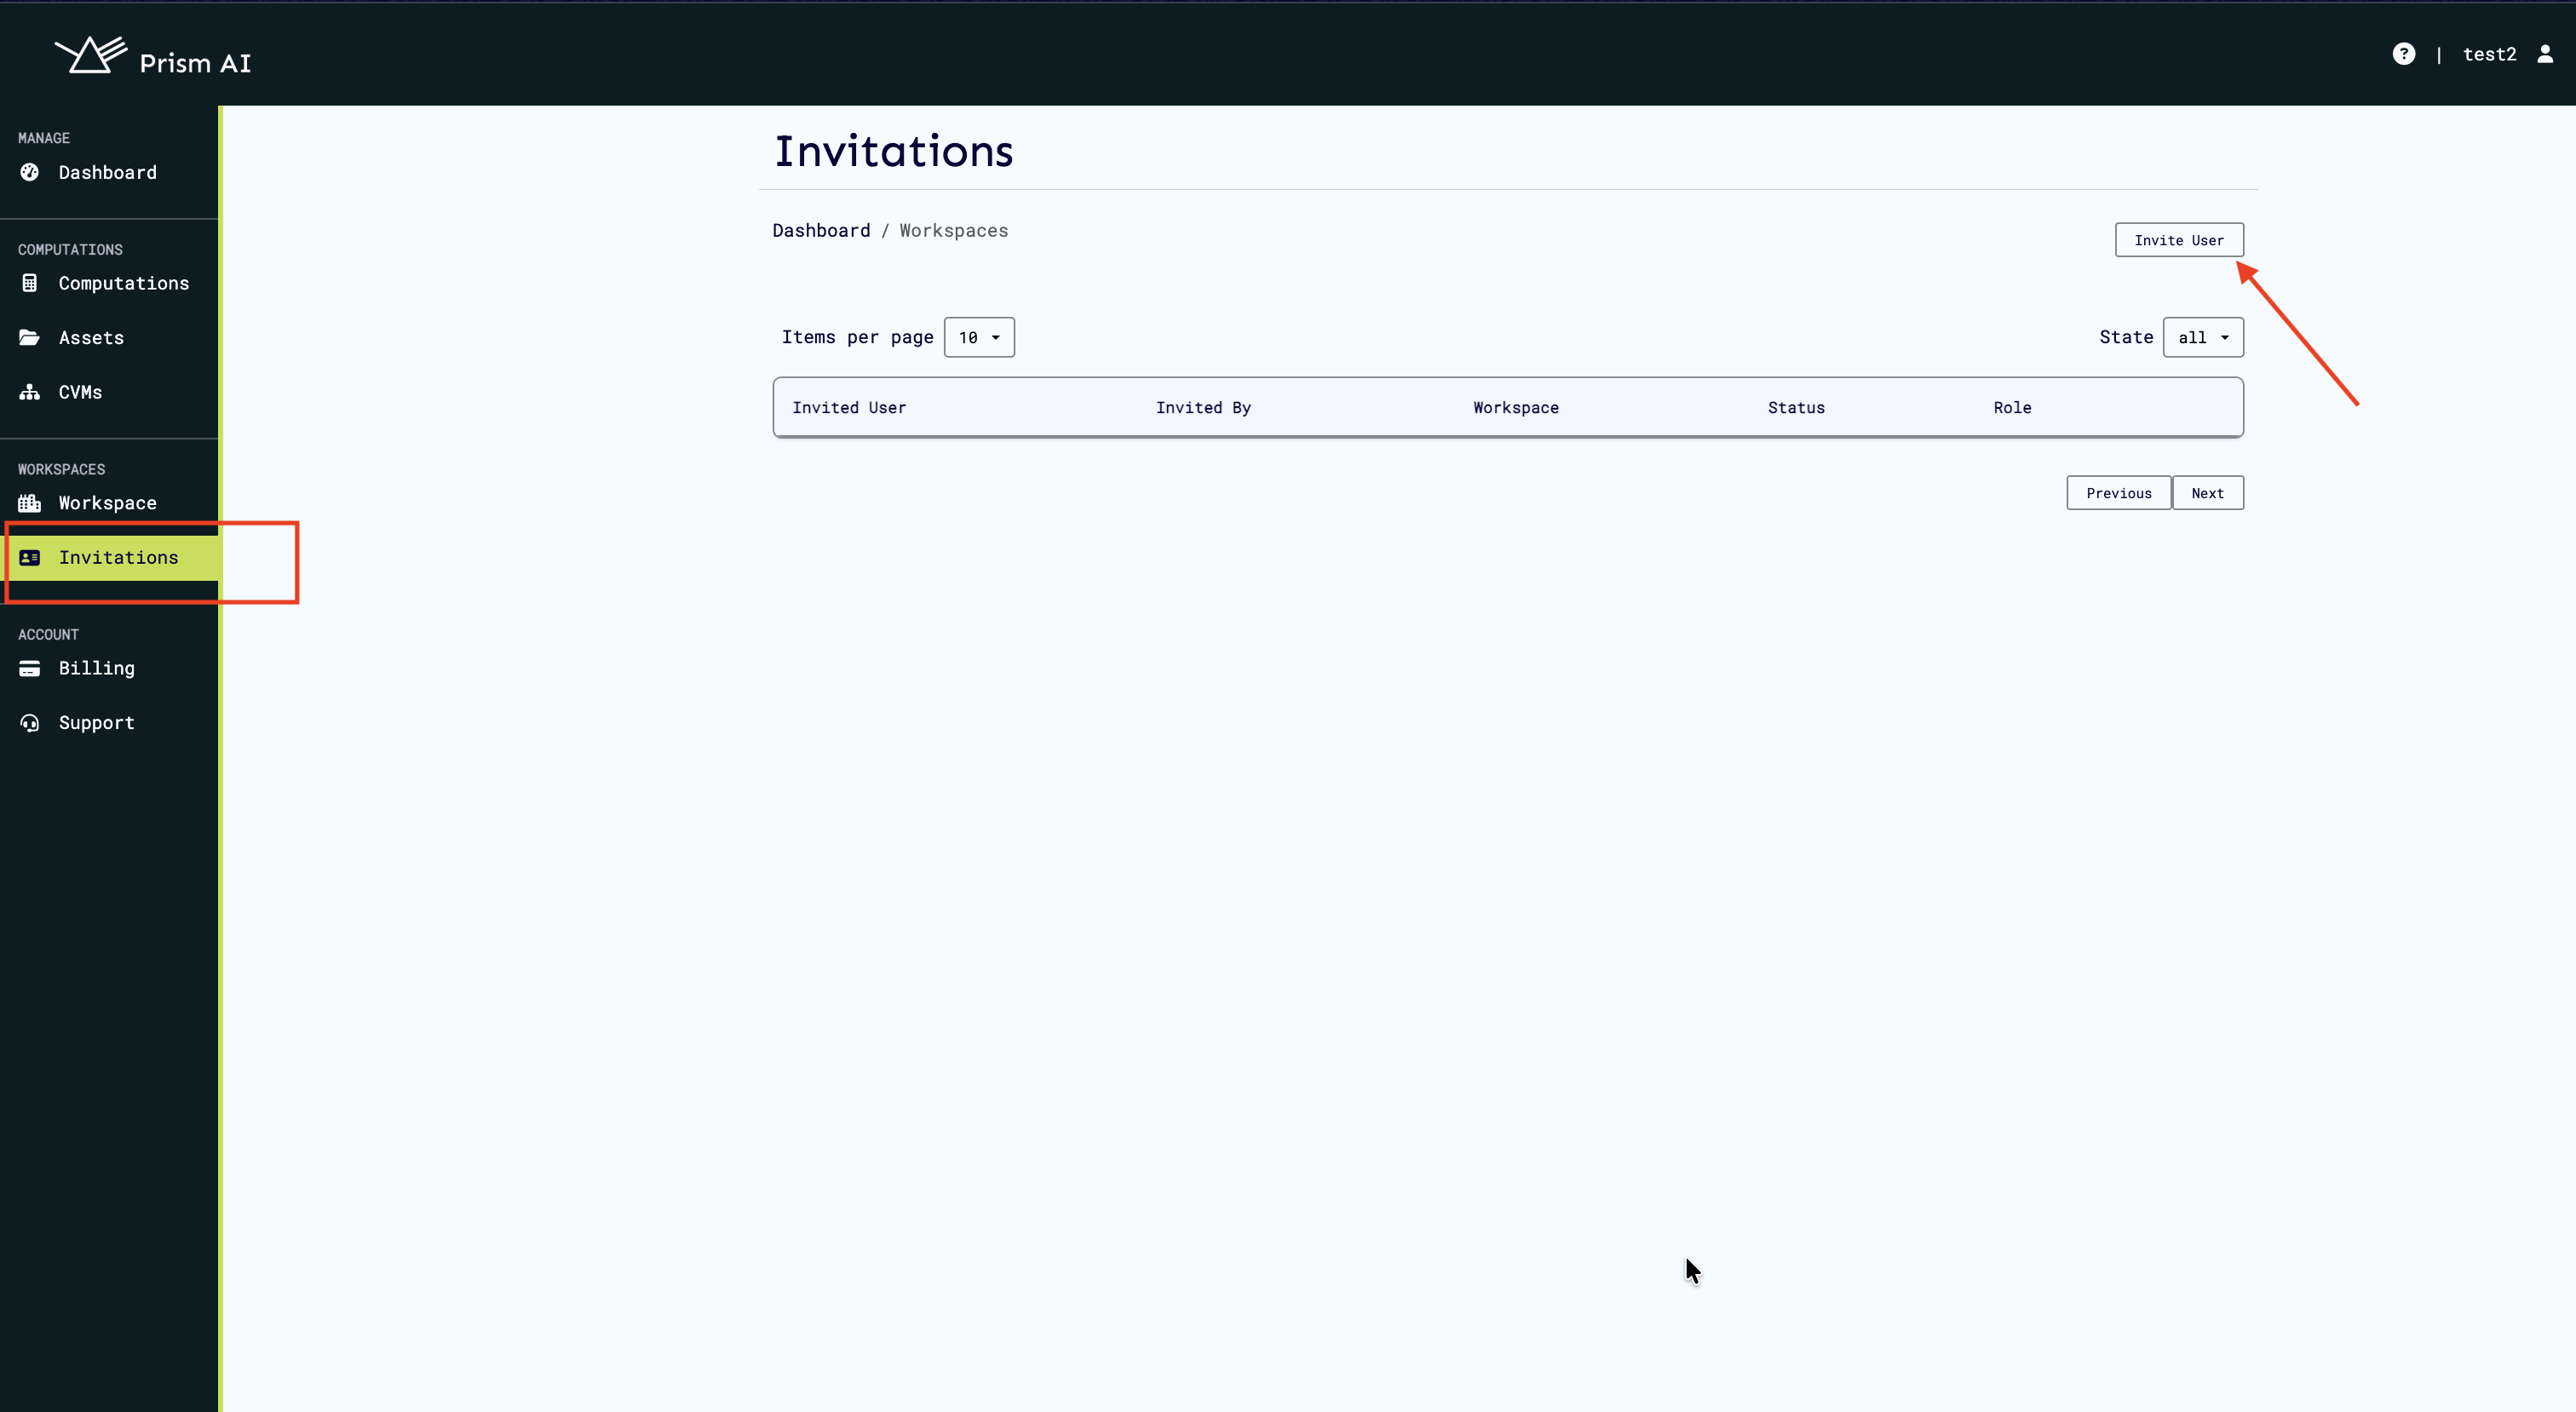
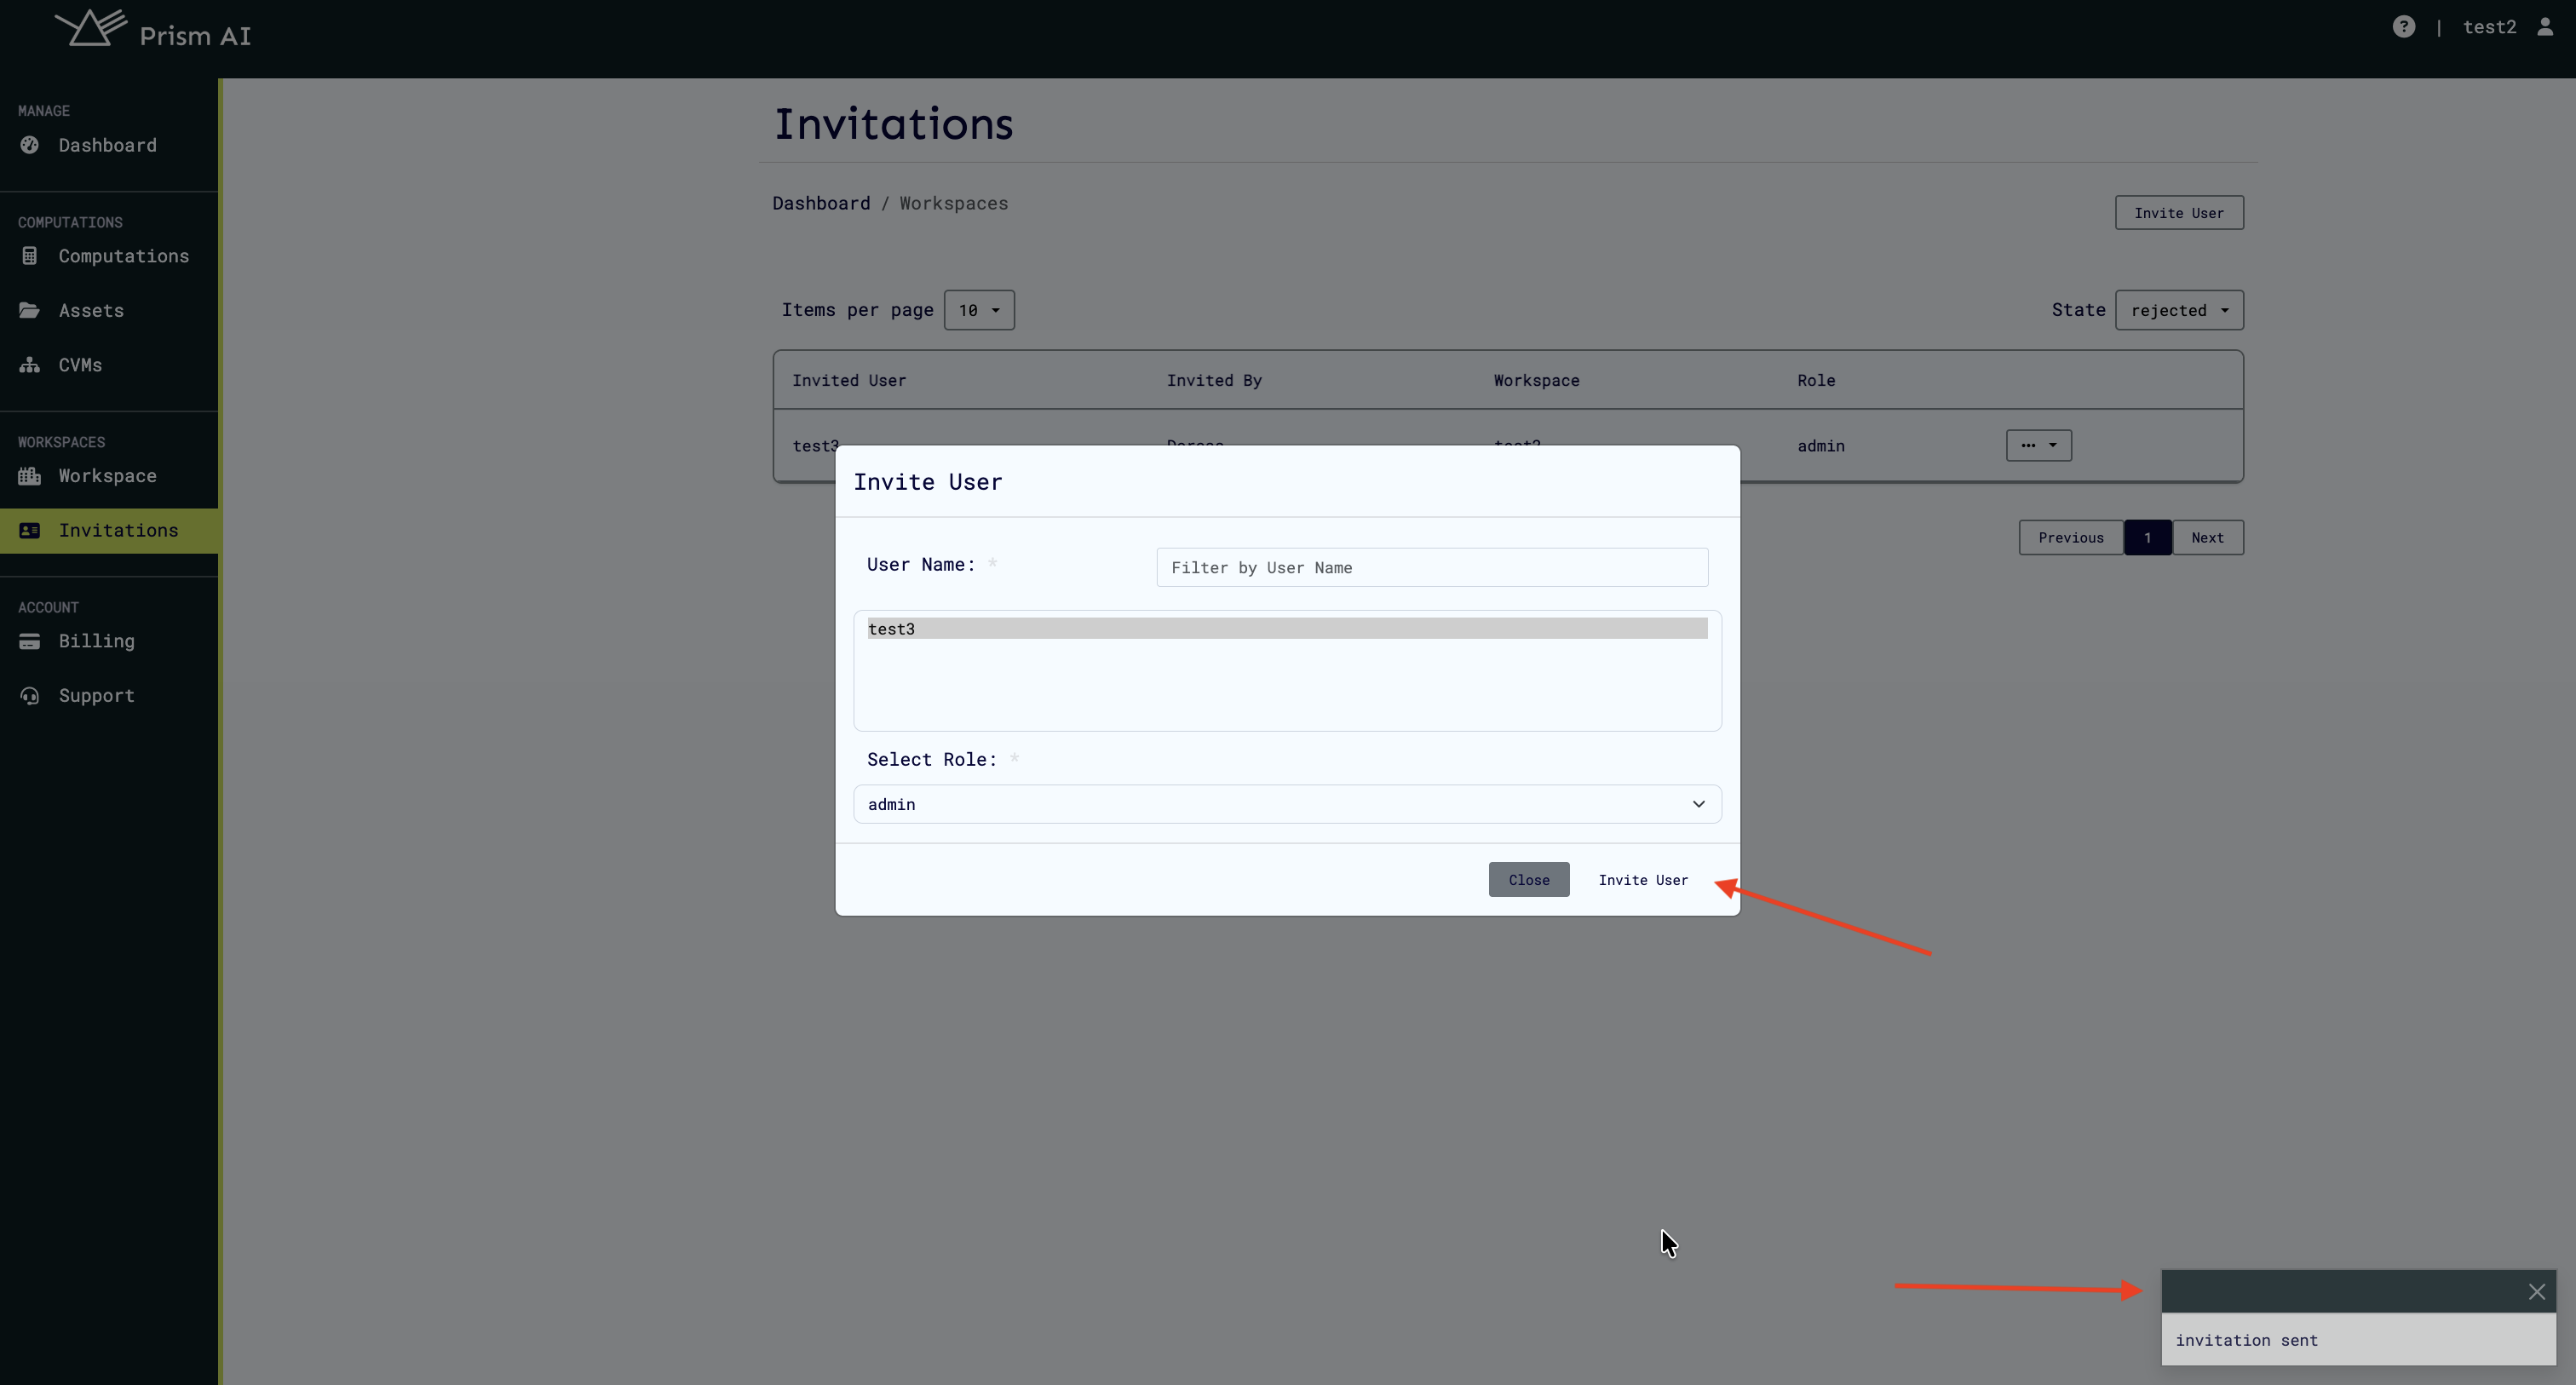
 2. Click Invite User
 3. Enter the user's details:
- Username
- Assigned role (e.g., Admin, Member, Viewer)
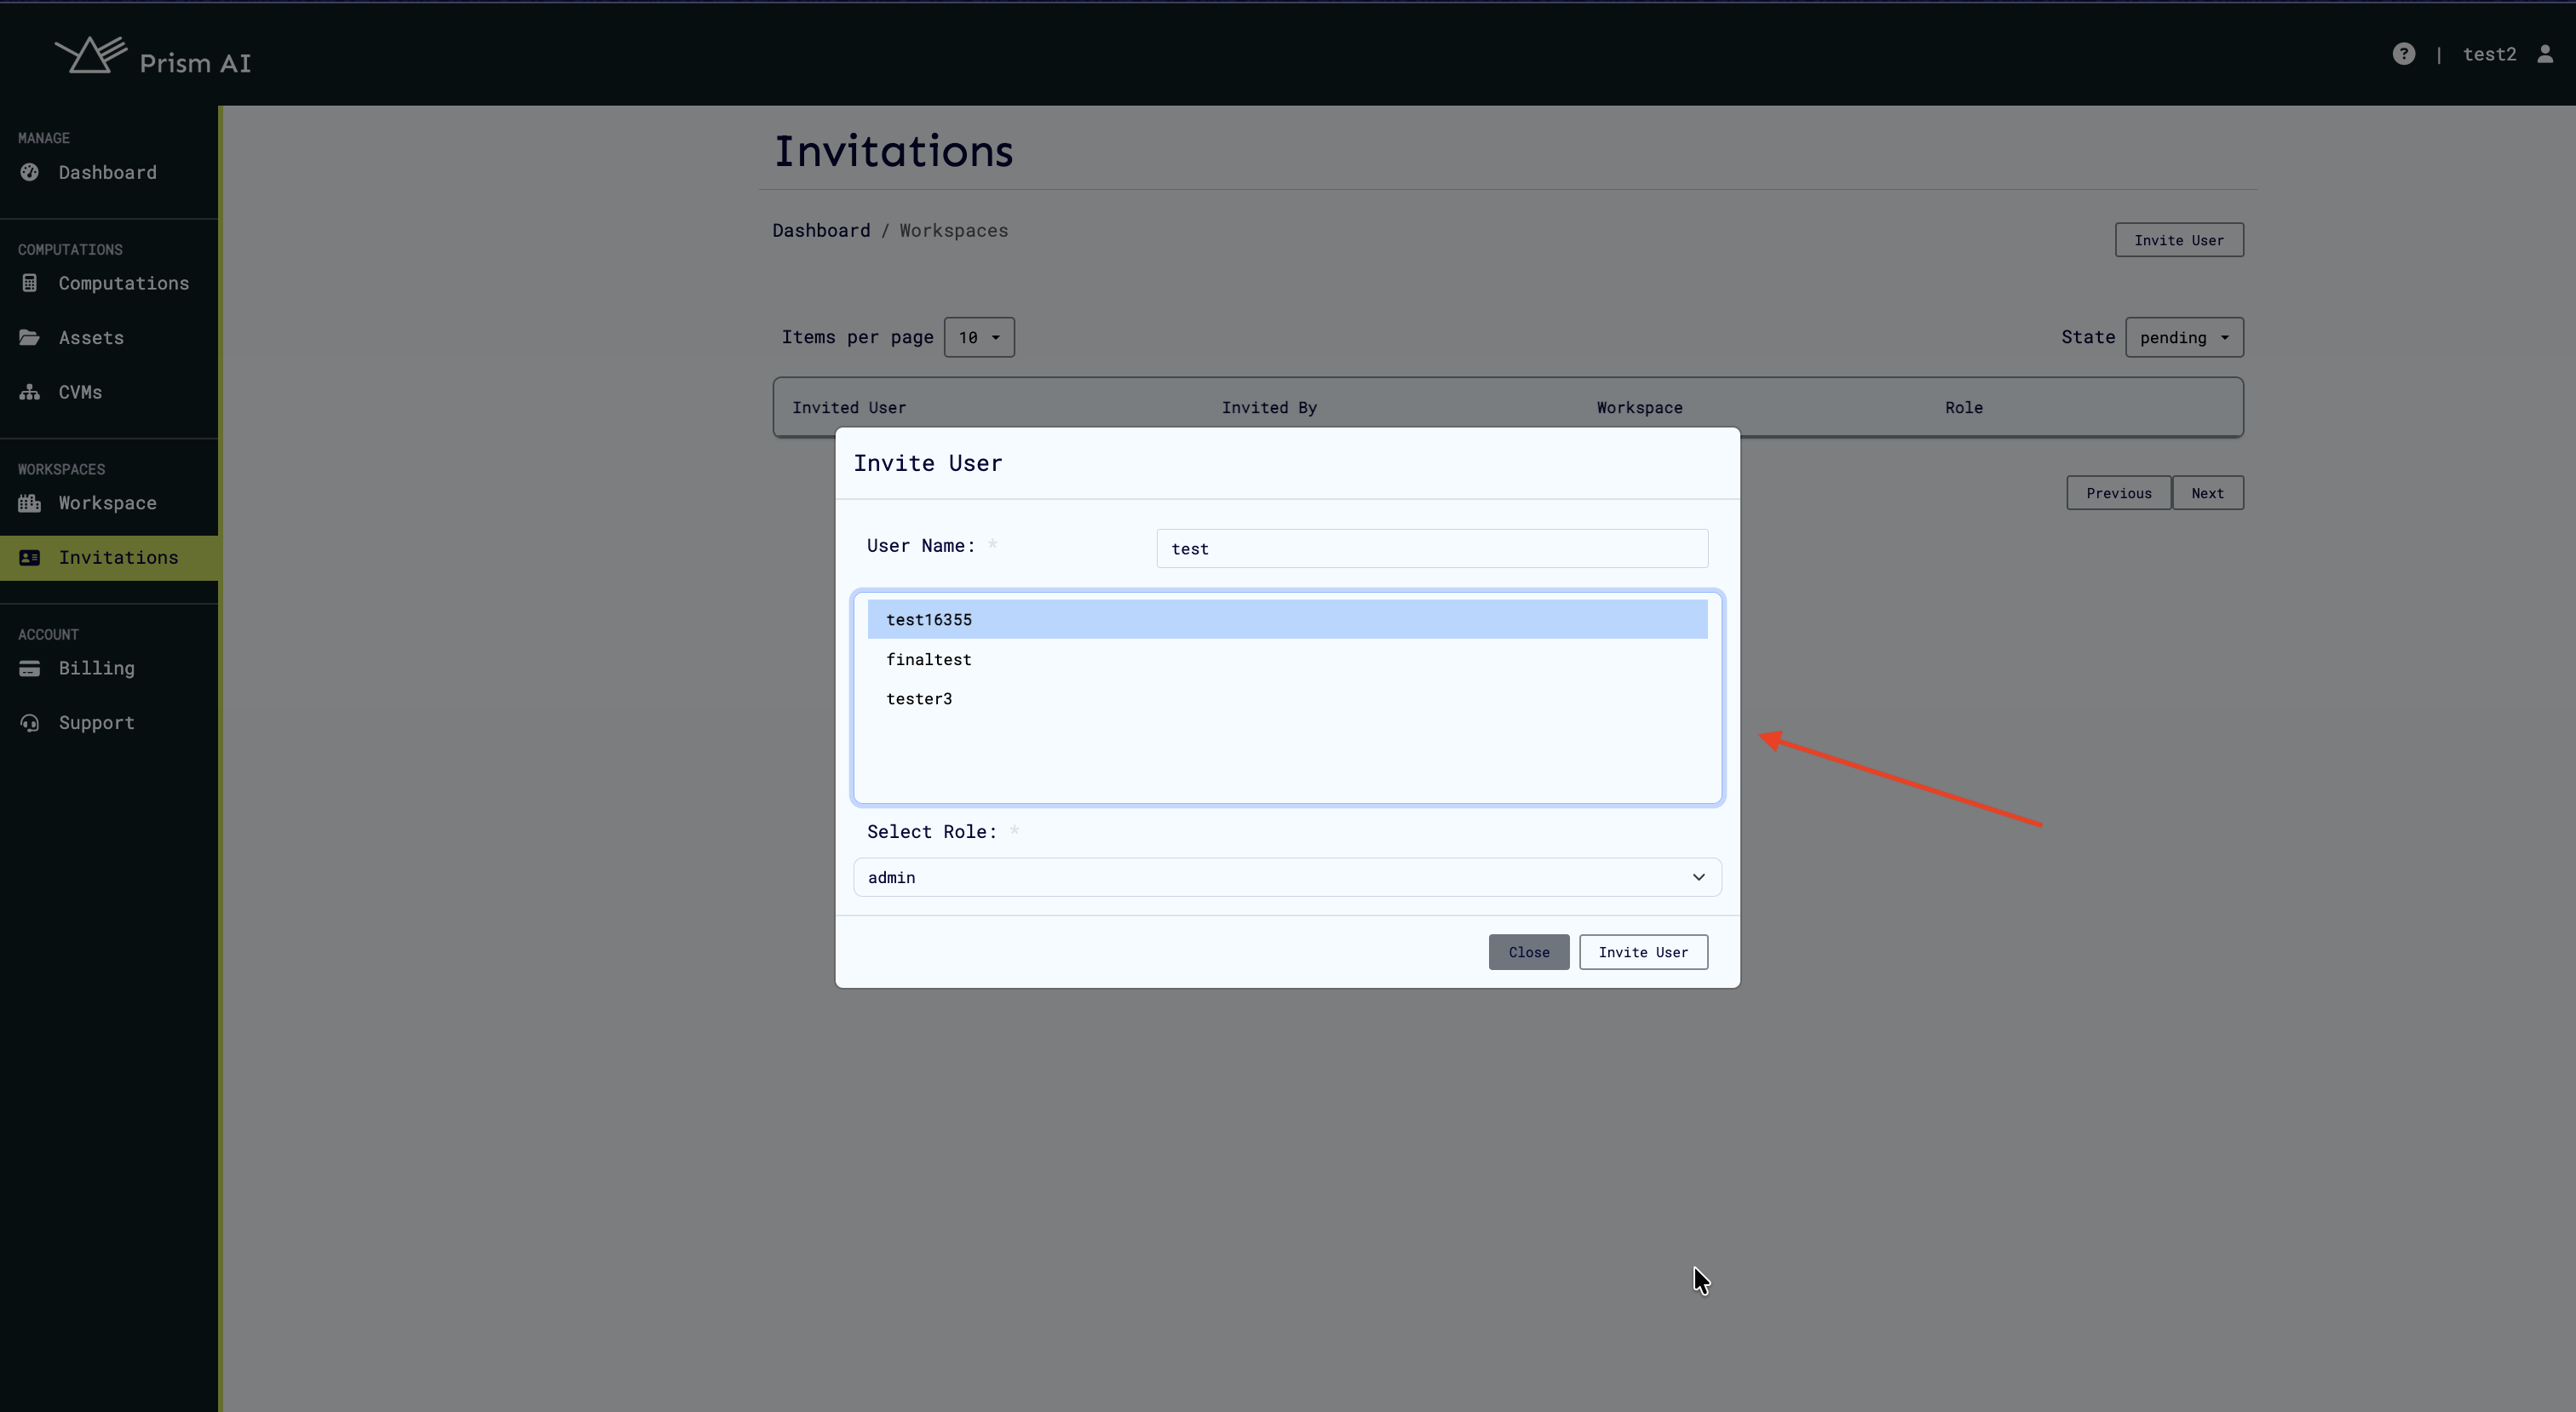 4. Click Send Invitation. The invitation will appear in your Invitations table with a Pending status.
Each invitation shows:
- Invited User — Name
- Invited By —Person who sent the invite
- Workspace — Destination workspace name
- Role — Access level assigned
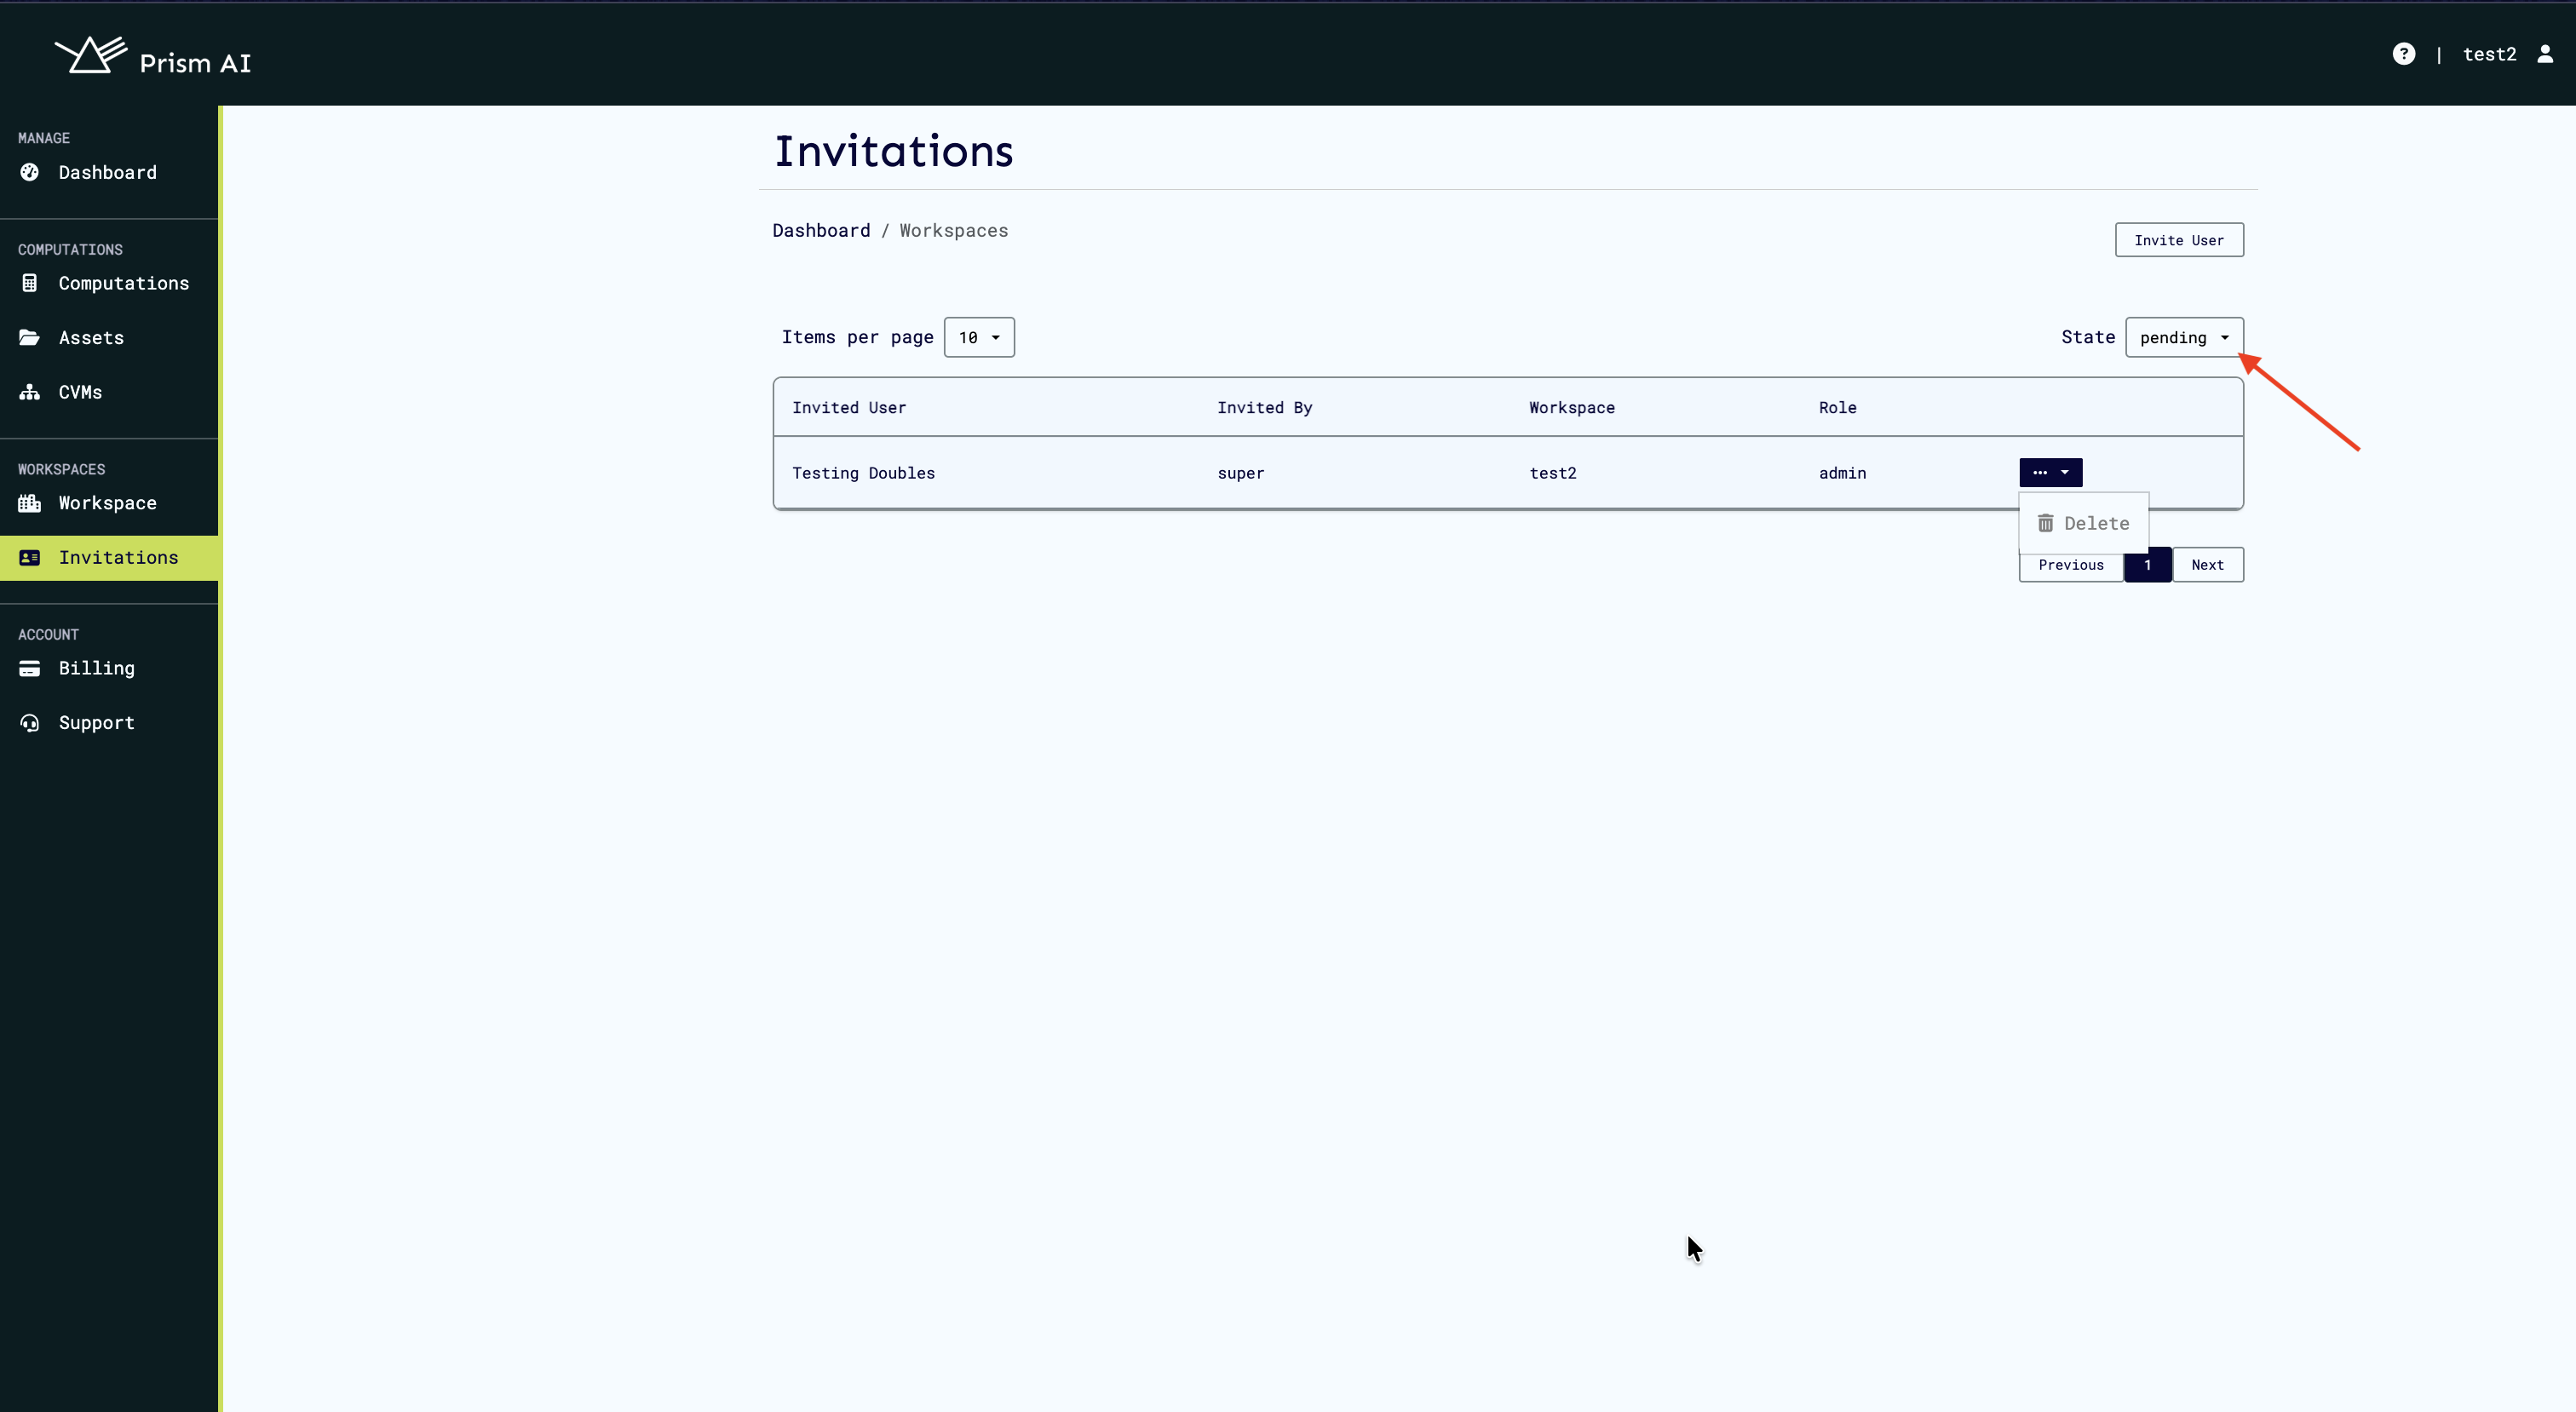
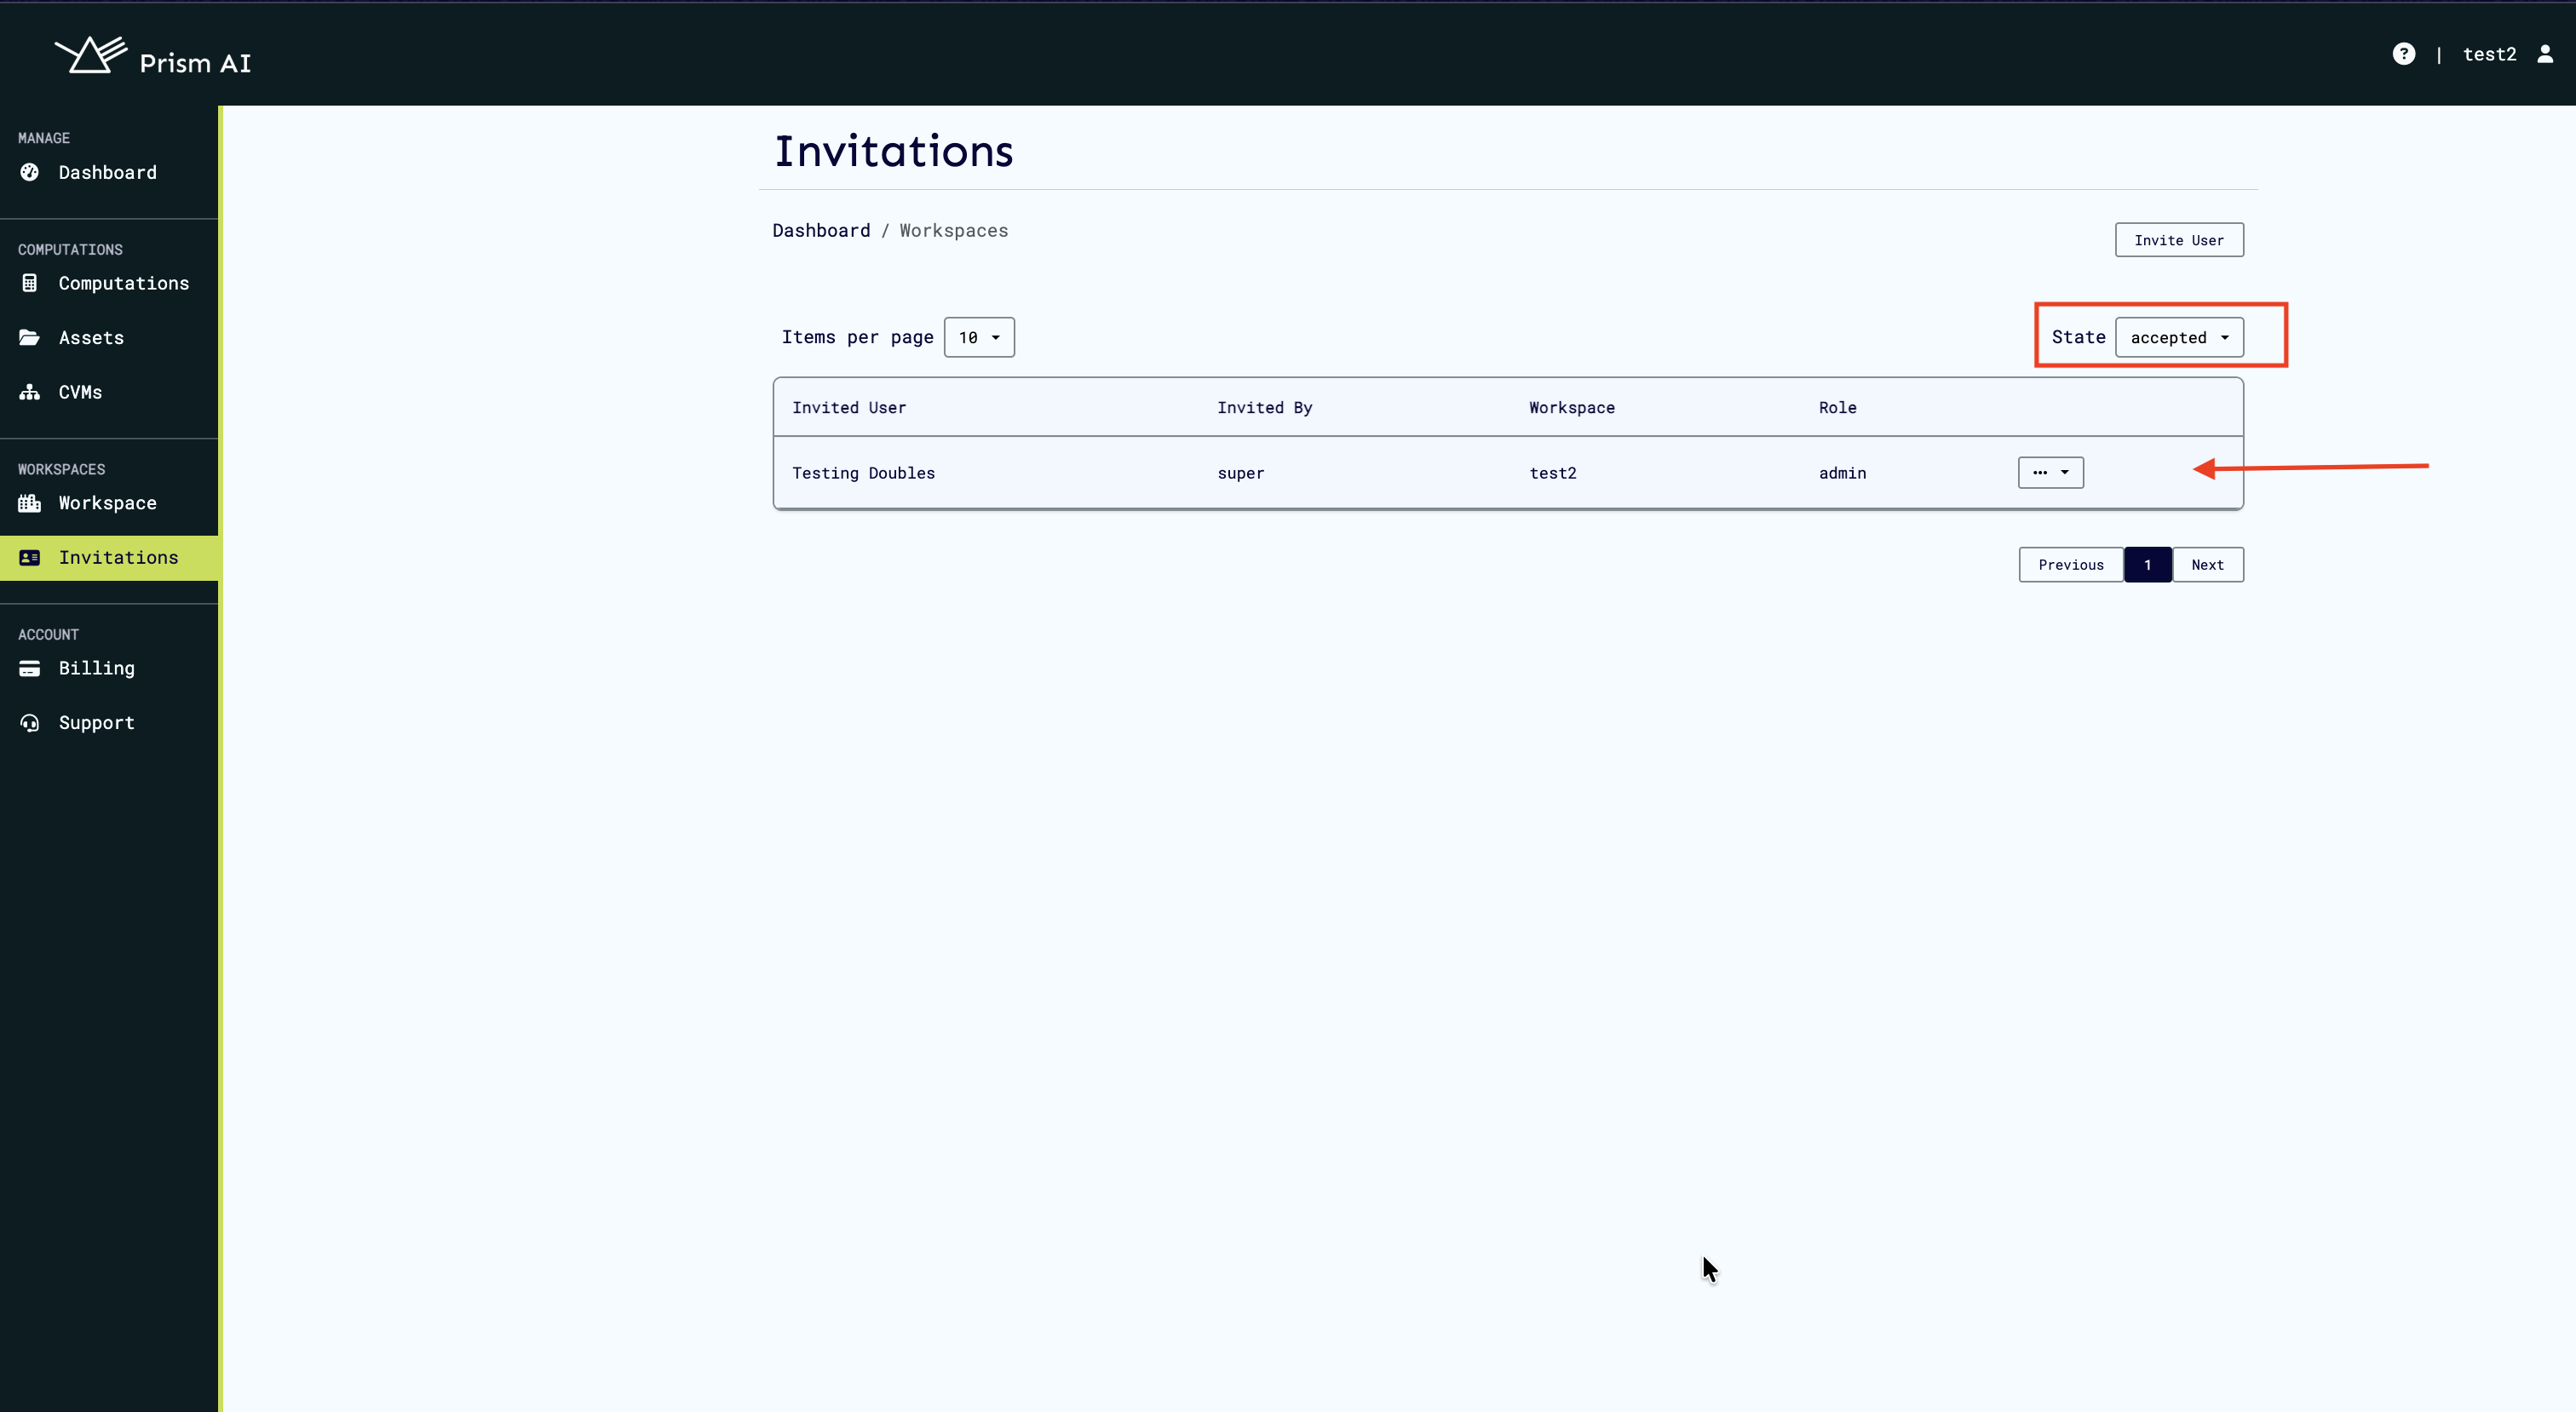
There are drop down menus to view:
- Status — Current state (Pending, Accepted, Declined)
- Actions — Options to manage the invitation
Note: You can only invite users who are already registered on Prism. The invitation system uses existing Prism member accounts.
Receiving and Viewing Invitations
When you're invited to a workspace, you'll see a notification badge on the Workspaces page.
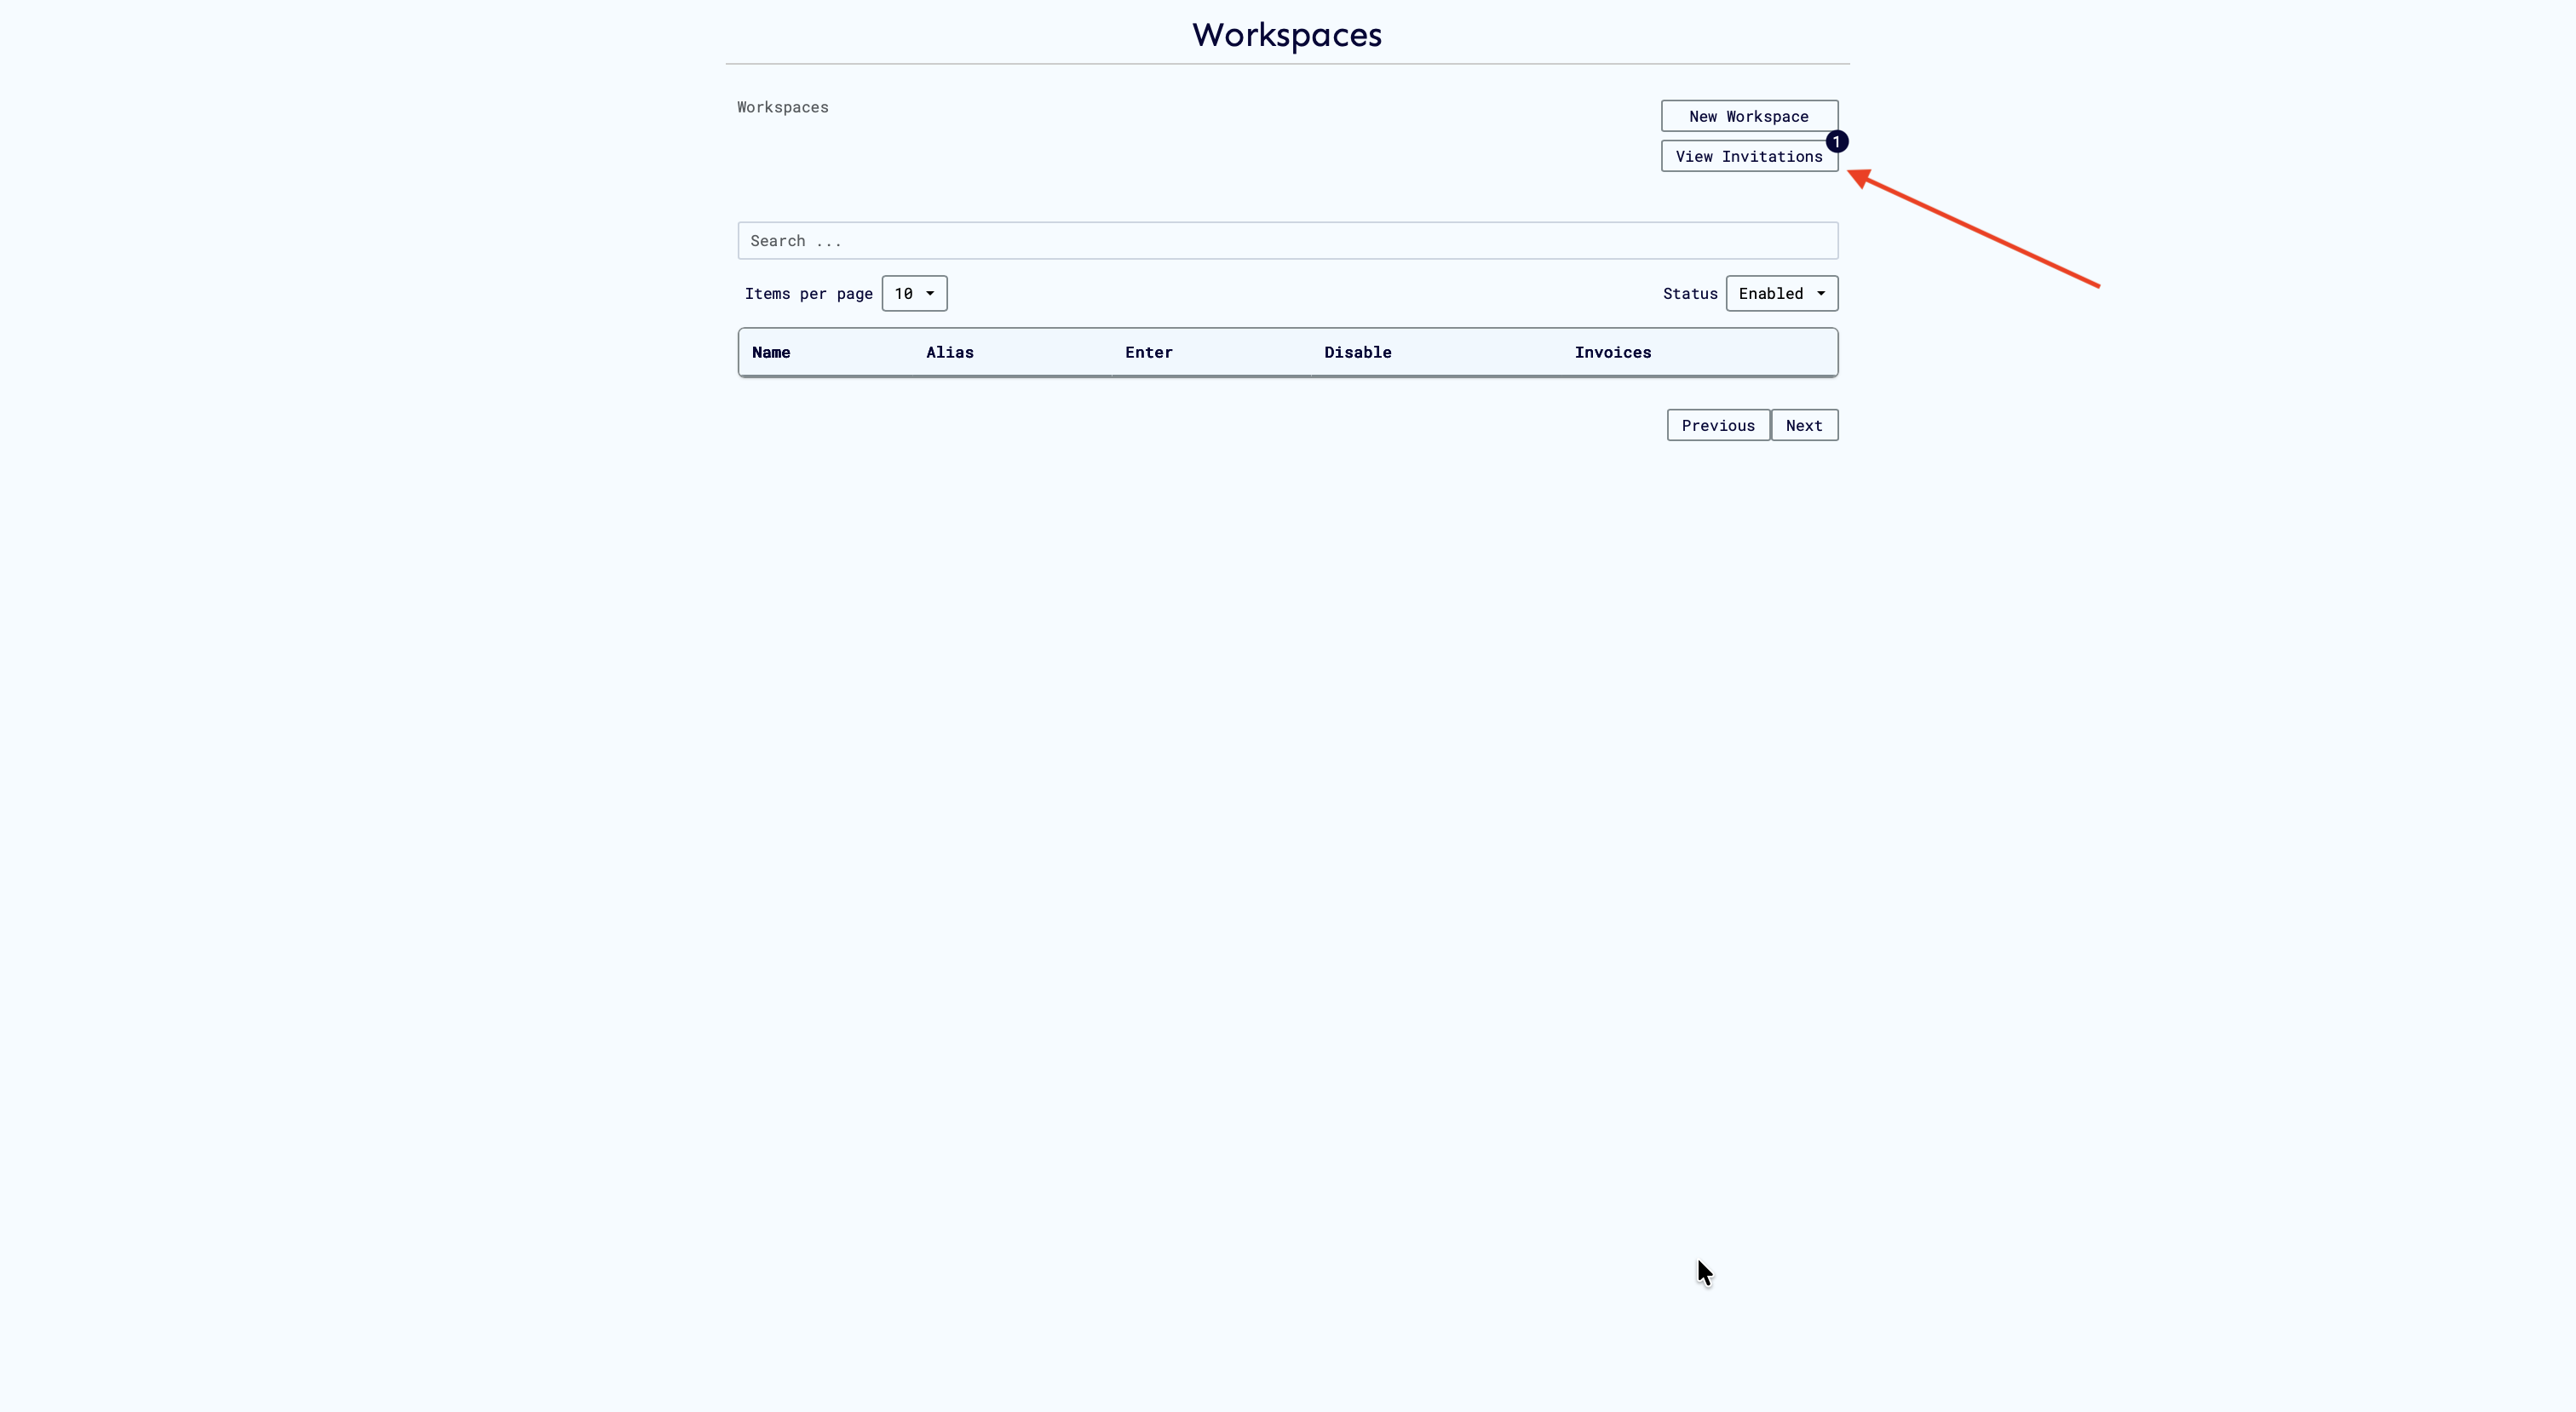
How to View Your Invitations
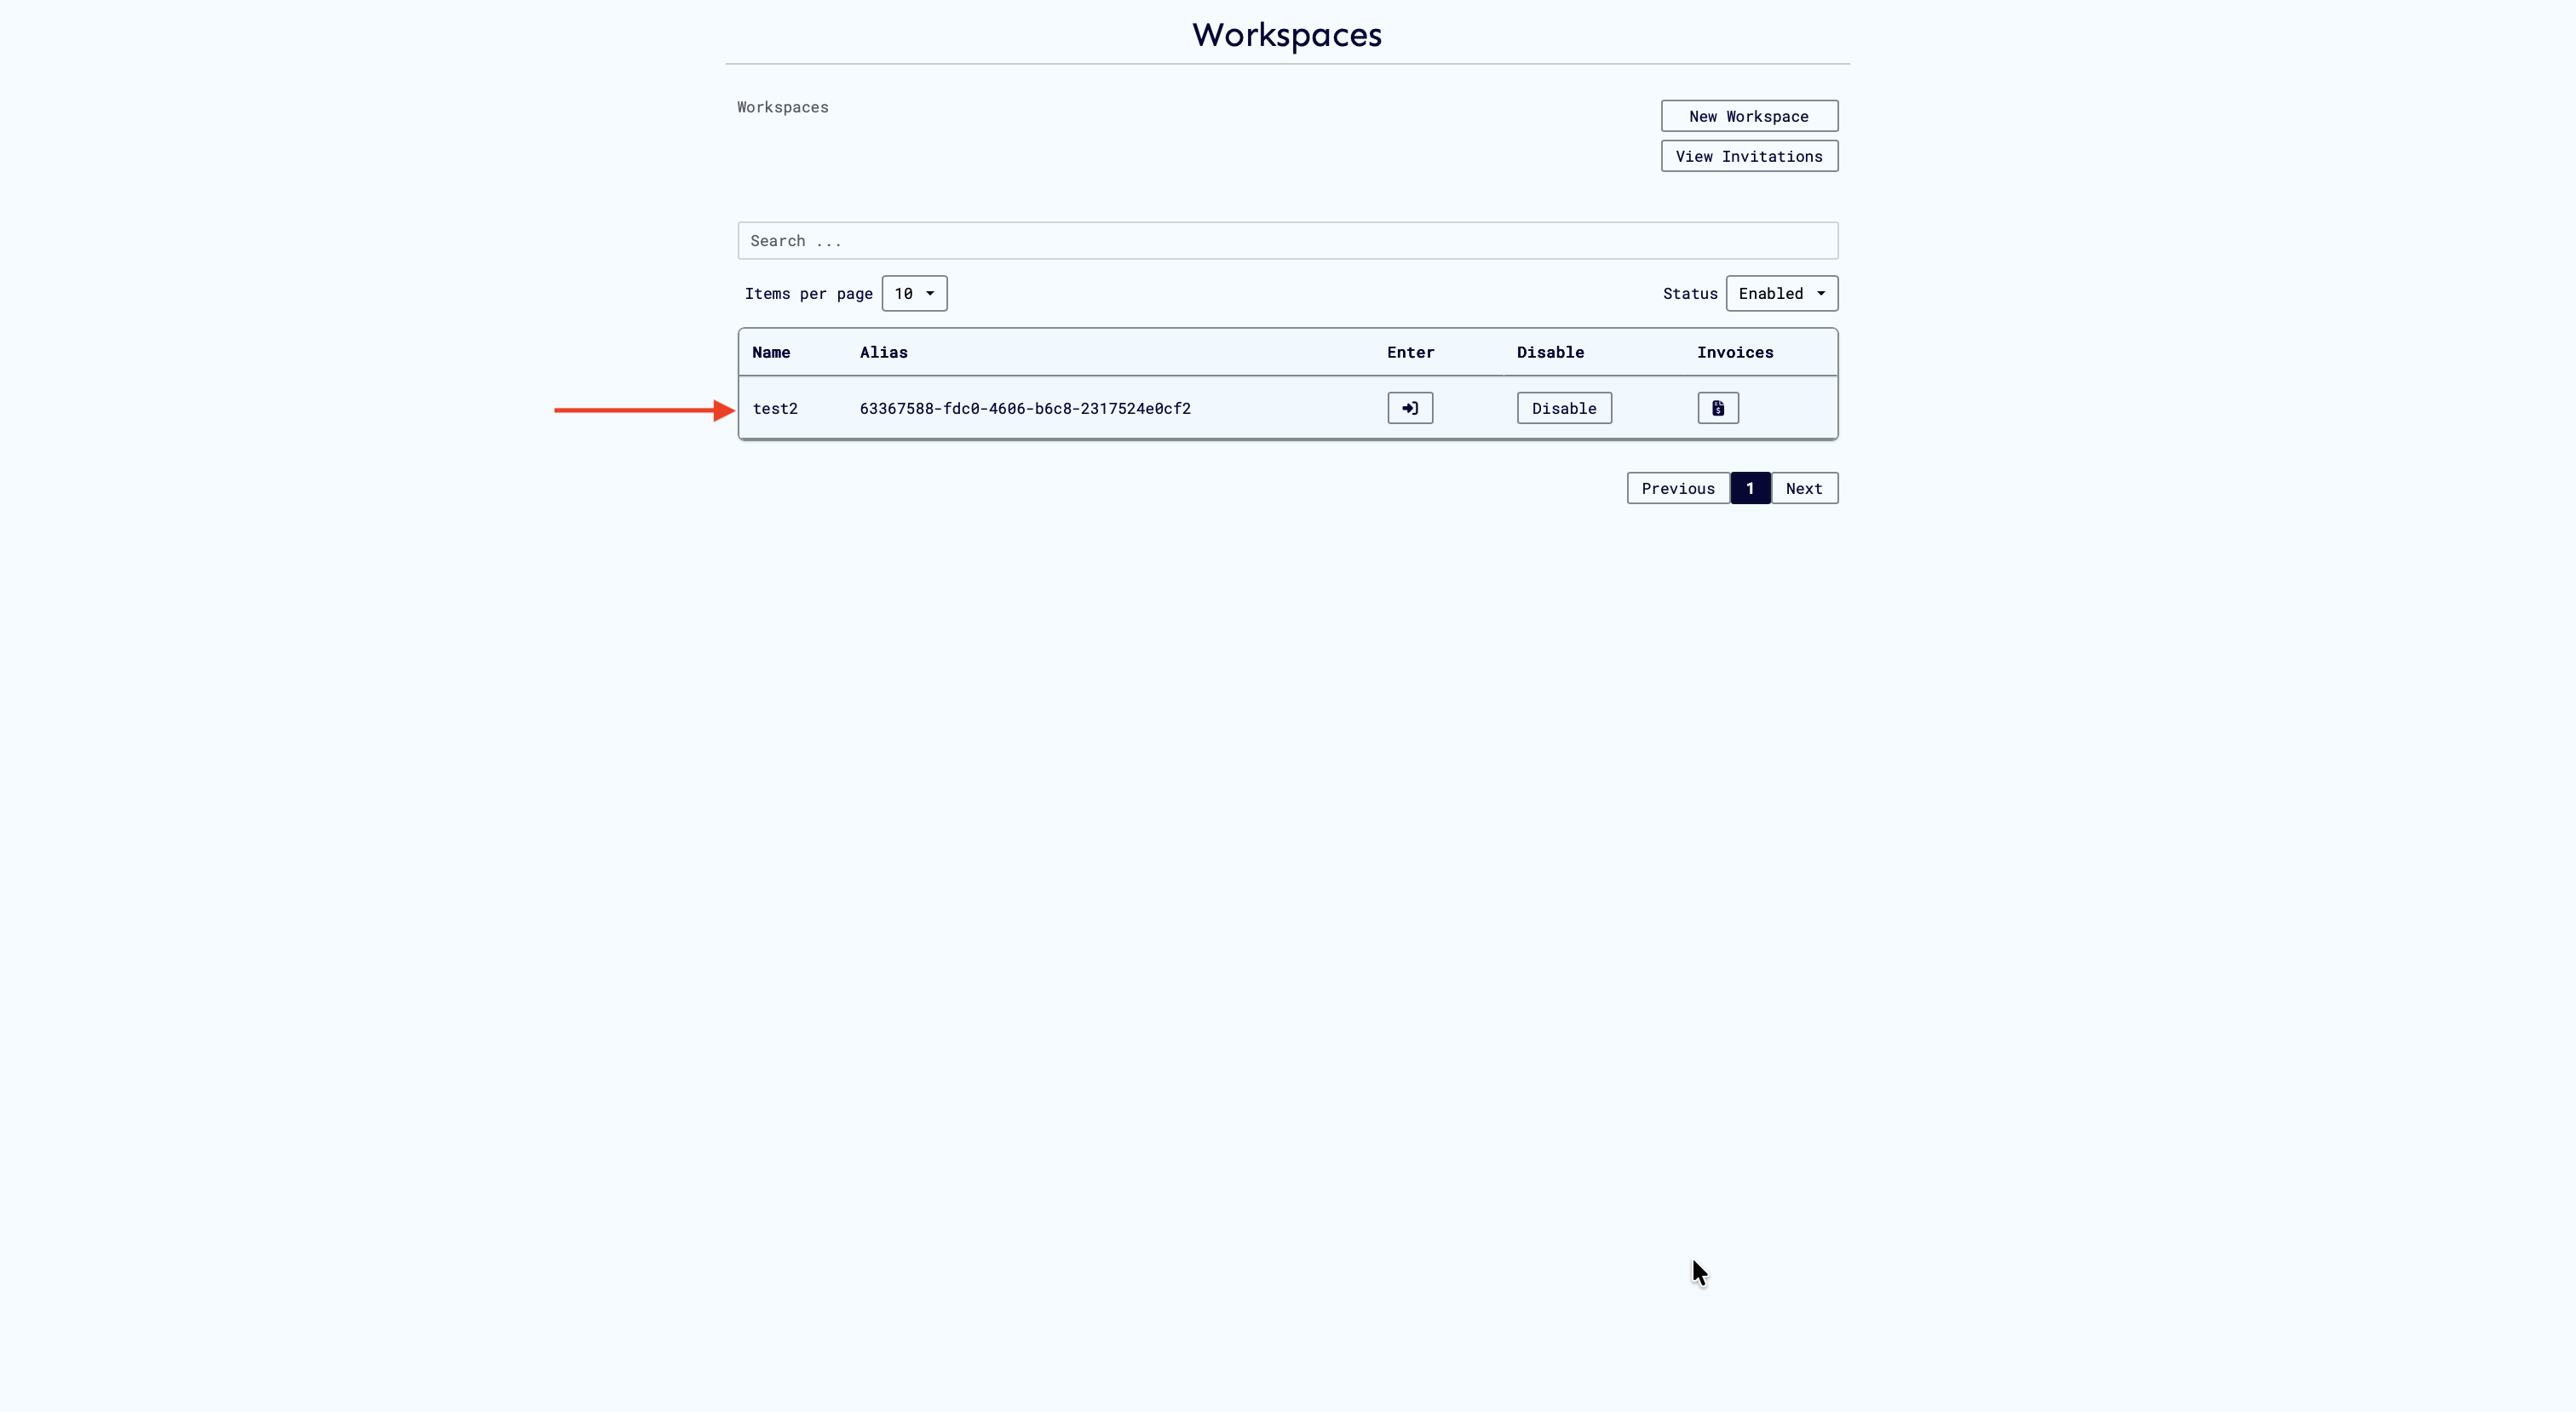
- Navigate to Workspaces
- Click View Invitations
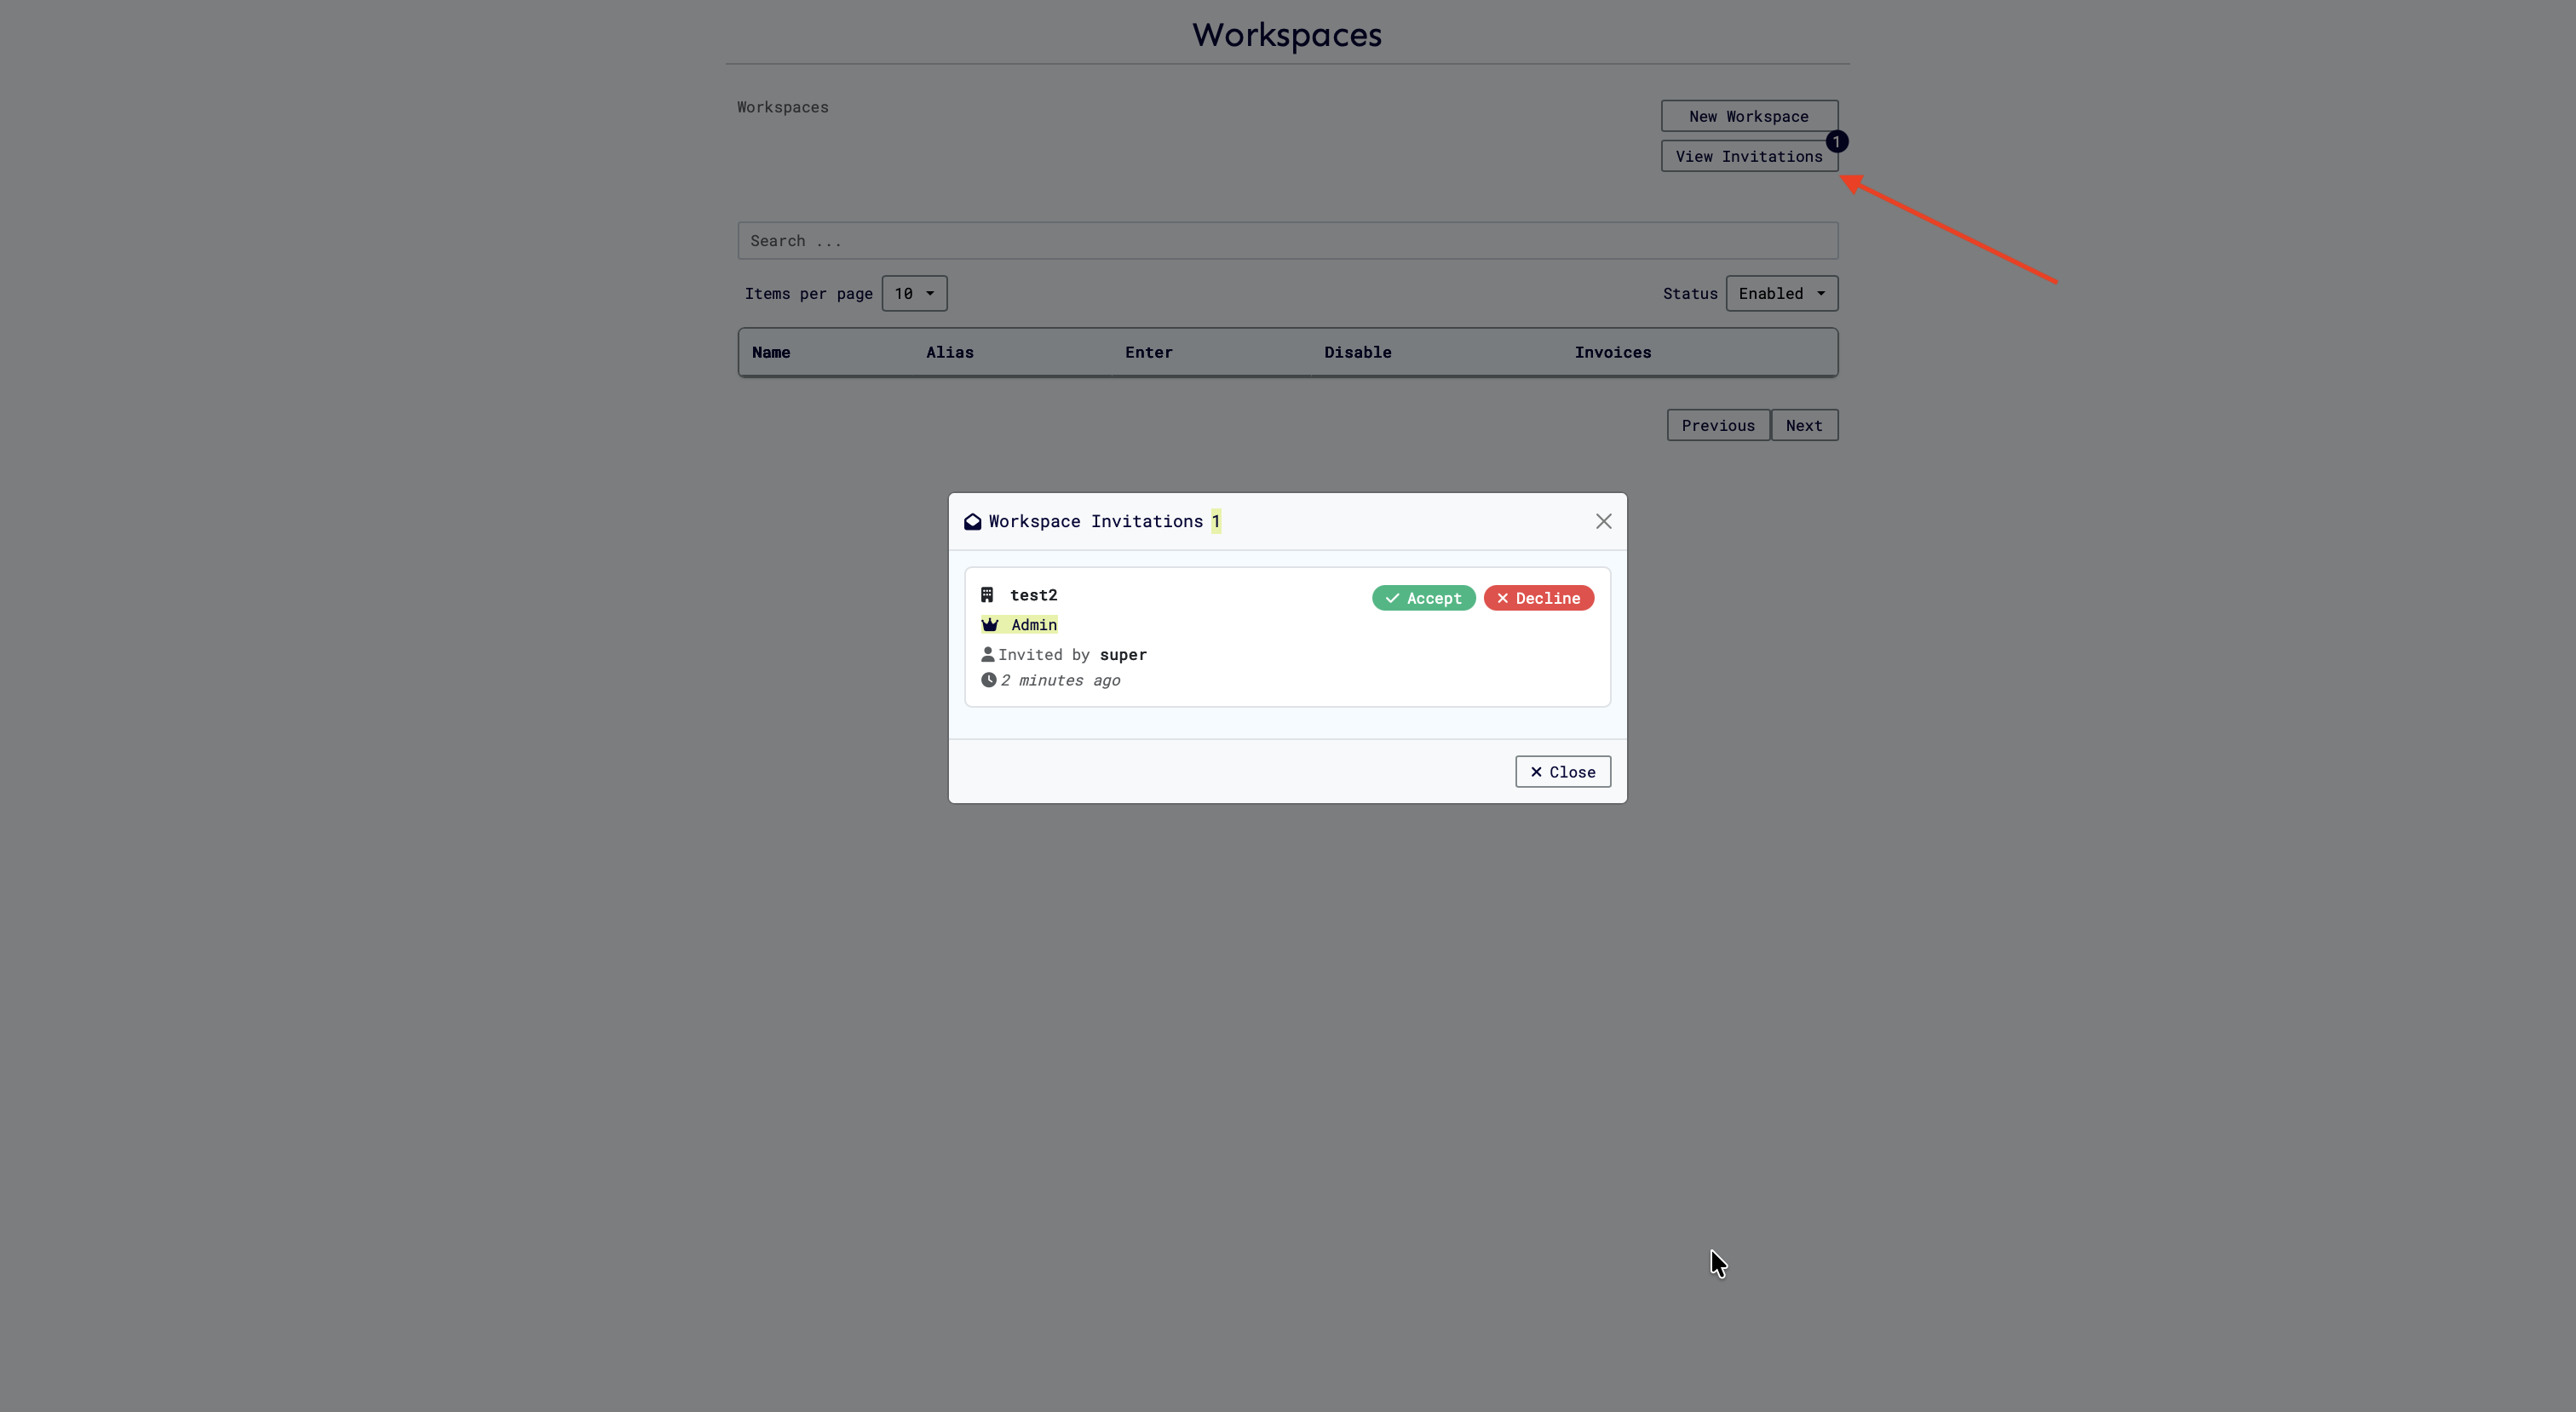
- A modal displays all pending invitations with:
- Workspace name
- Your assigned role
- Who invited you
- When you were invited
- Accept and Decline buttons
Responding to Invitations
Accepting an Invitation
- Click Accept in the invitation modal
- You'll be added to the workspace immediately
- The invitation status changes to Accepted
- You can now access the workspace with your assigned role
Rejected Invitations
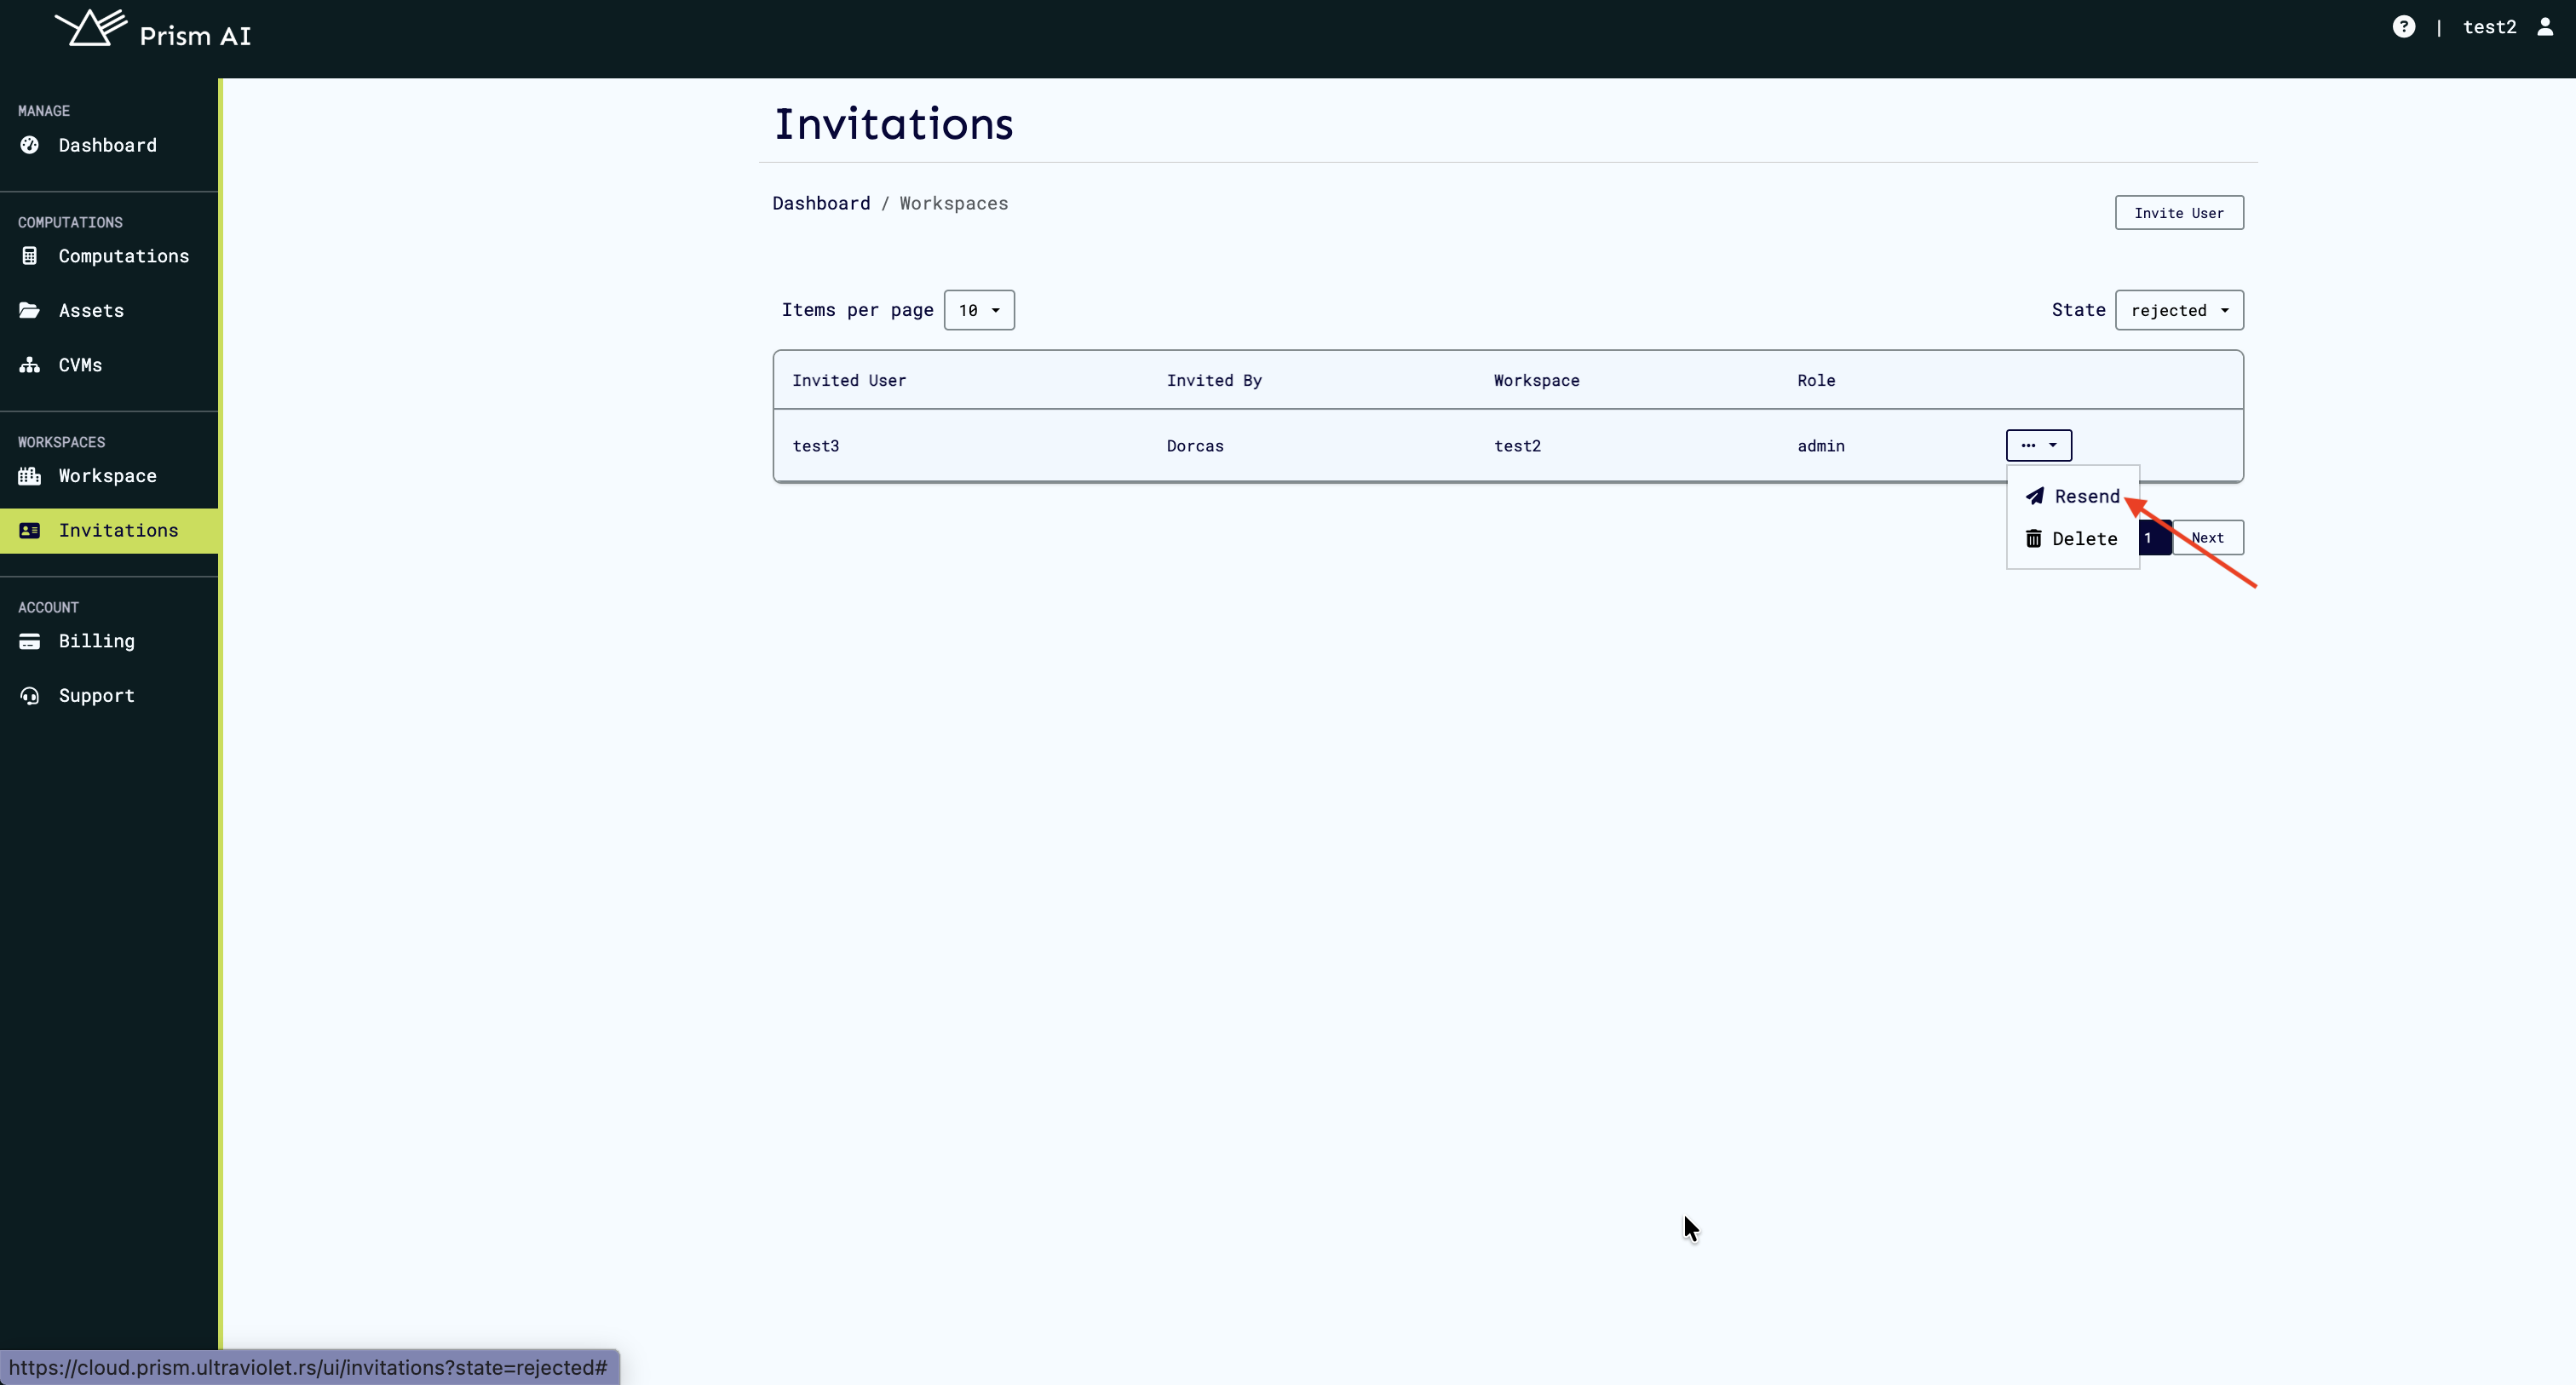
When a user declines an invitation, it appears in the rejected invitations view:
You can choose to:
- Resend the invitation if circumstances have changed
- Delete the invitation to remove it from your list
Resending Invitations
If an invitation was declined or if the user wants to reconsider, you can resend it.
Steps to Resend
- Locate the invitation in your invitations list
- Click the Resend button
It will open a modal to reinvite the user:
- Confirm the action
The user will receive a new invitation notification, and the invitation status will reset to Pending.
Deleting Invitations
Remove unwanted or outdated invitations from your workspace.
Steps to Delete
- Find the invitation you want to remove
- Click the Delete button
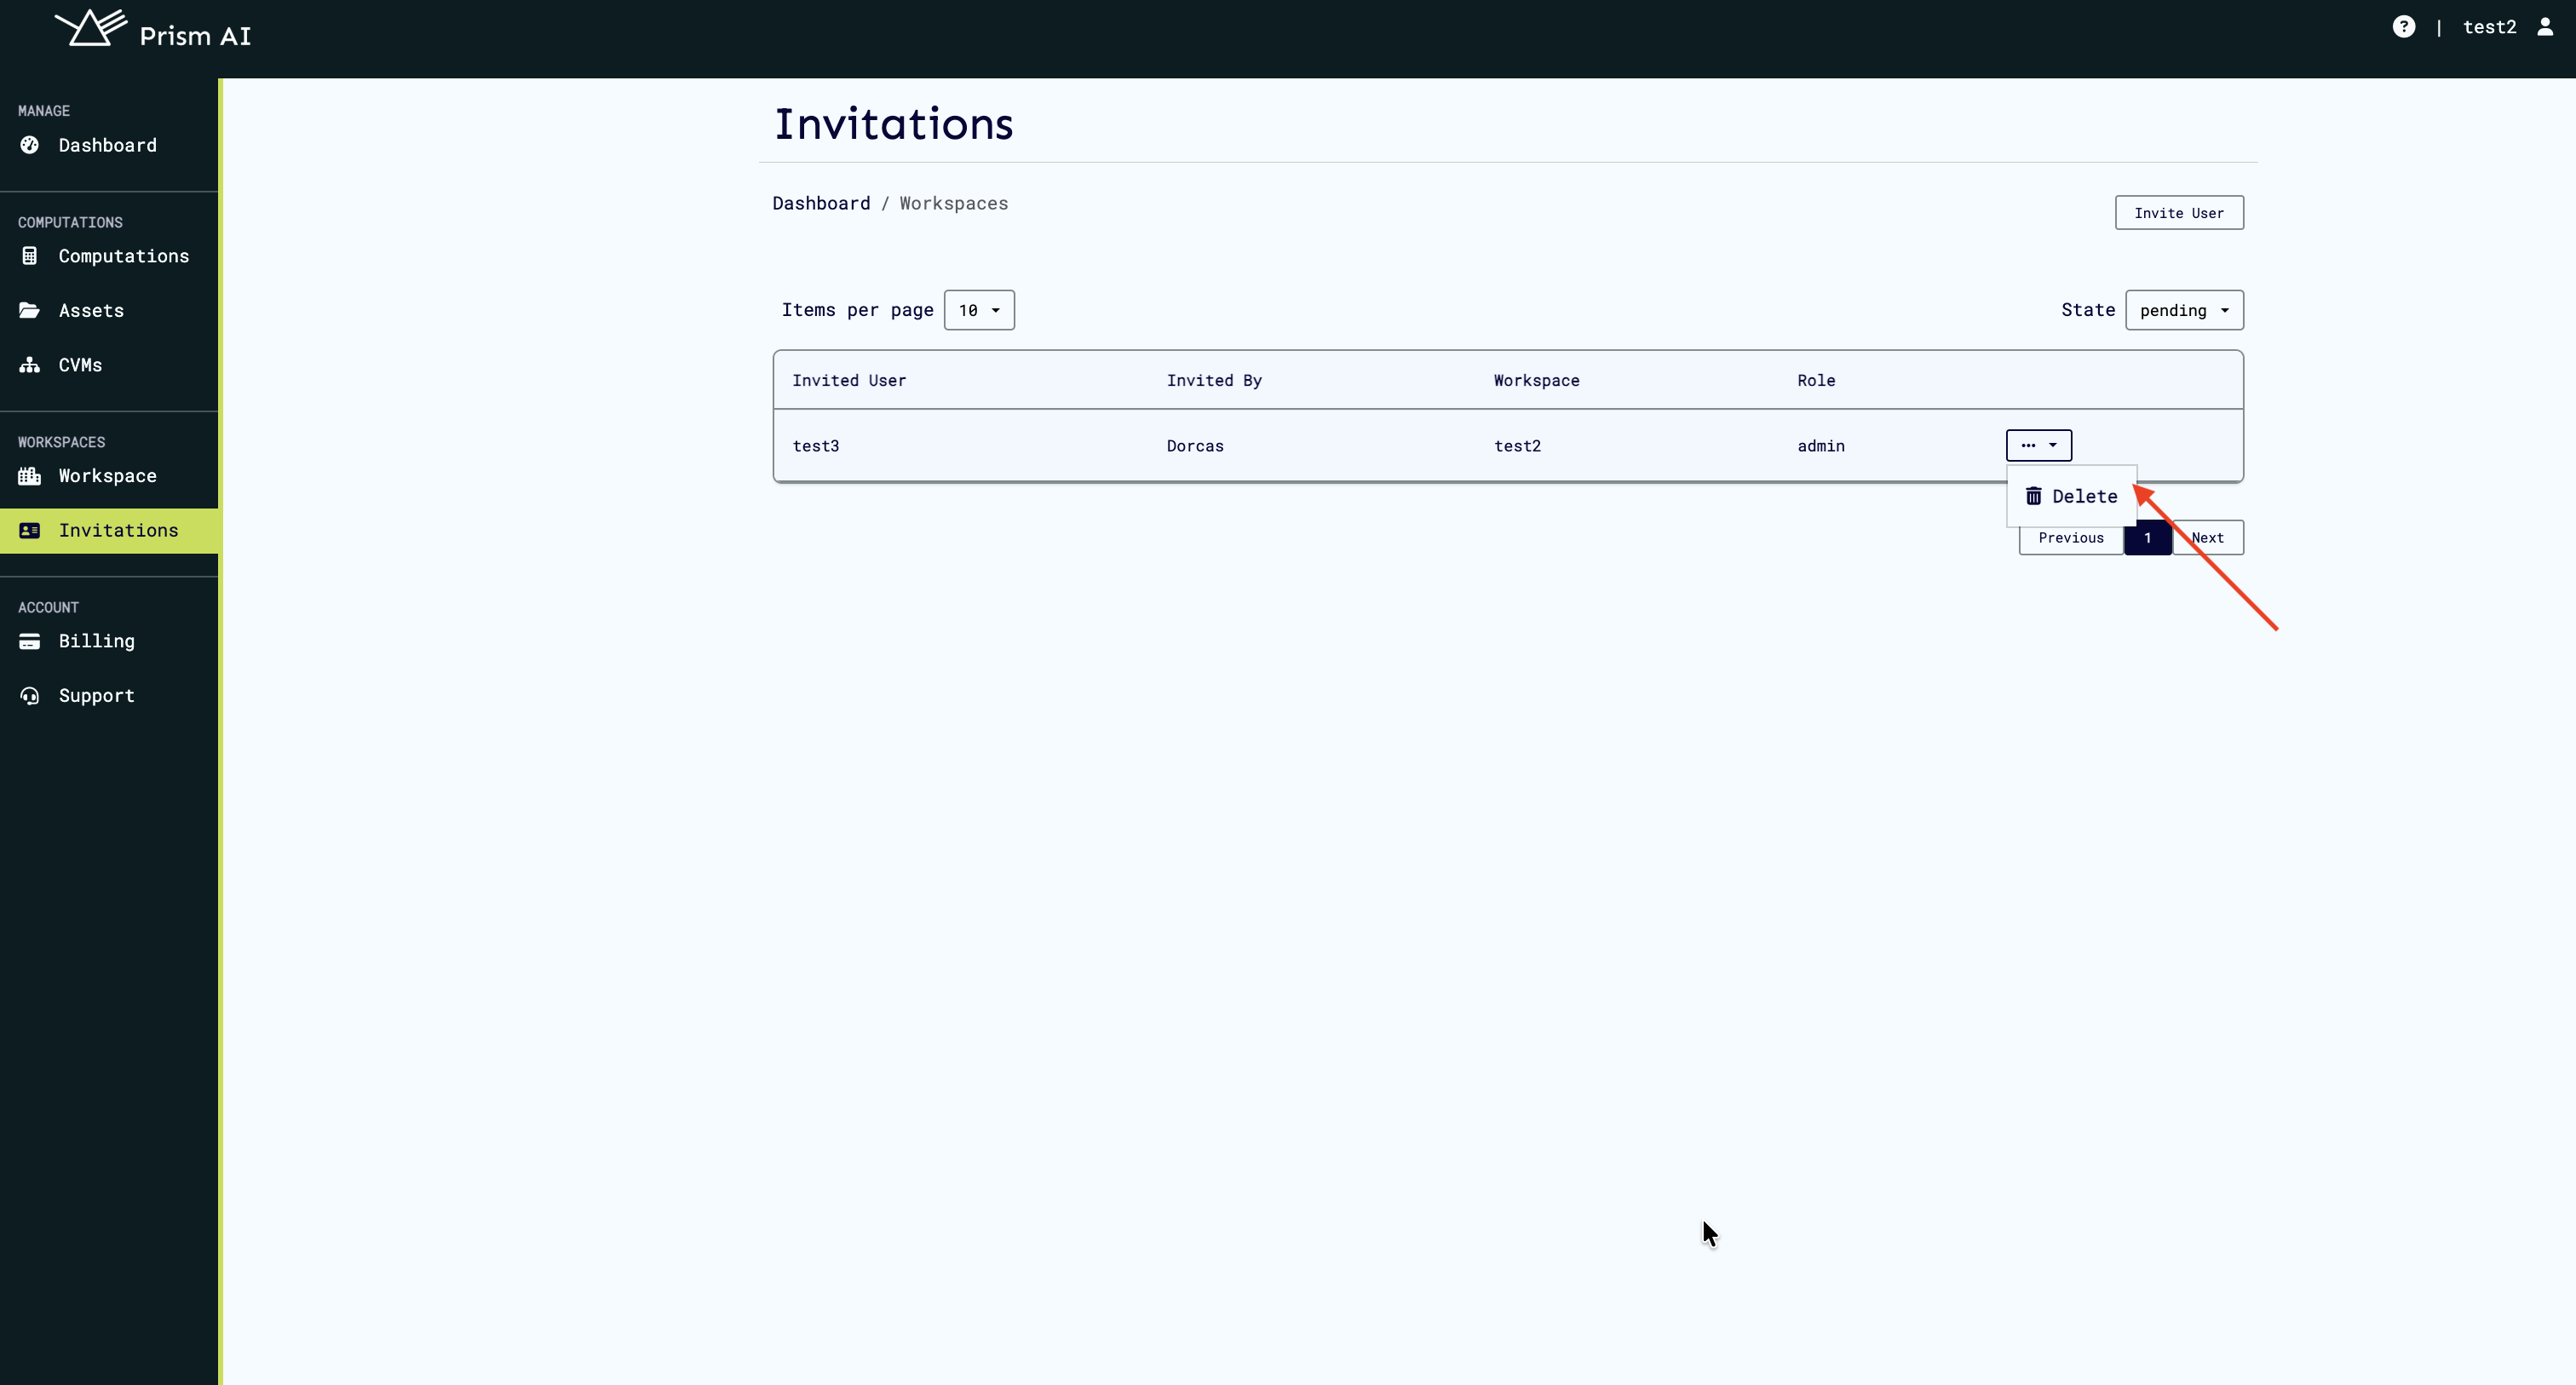
- Confirm the deletion in the popup
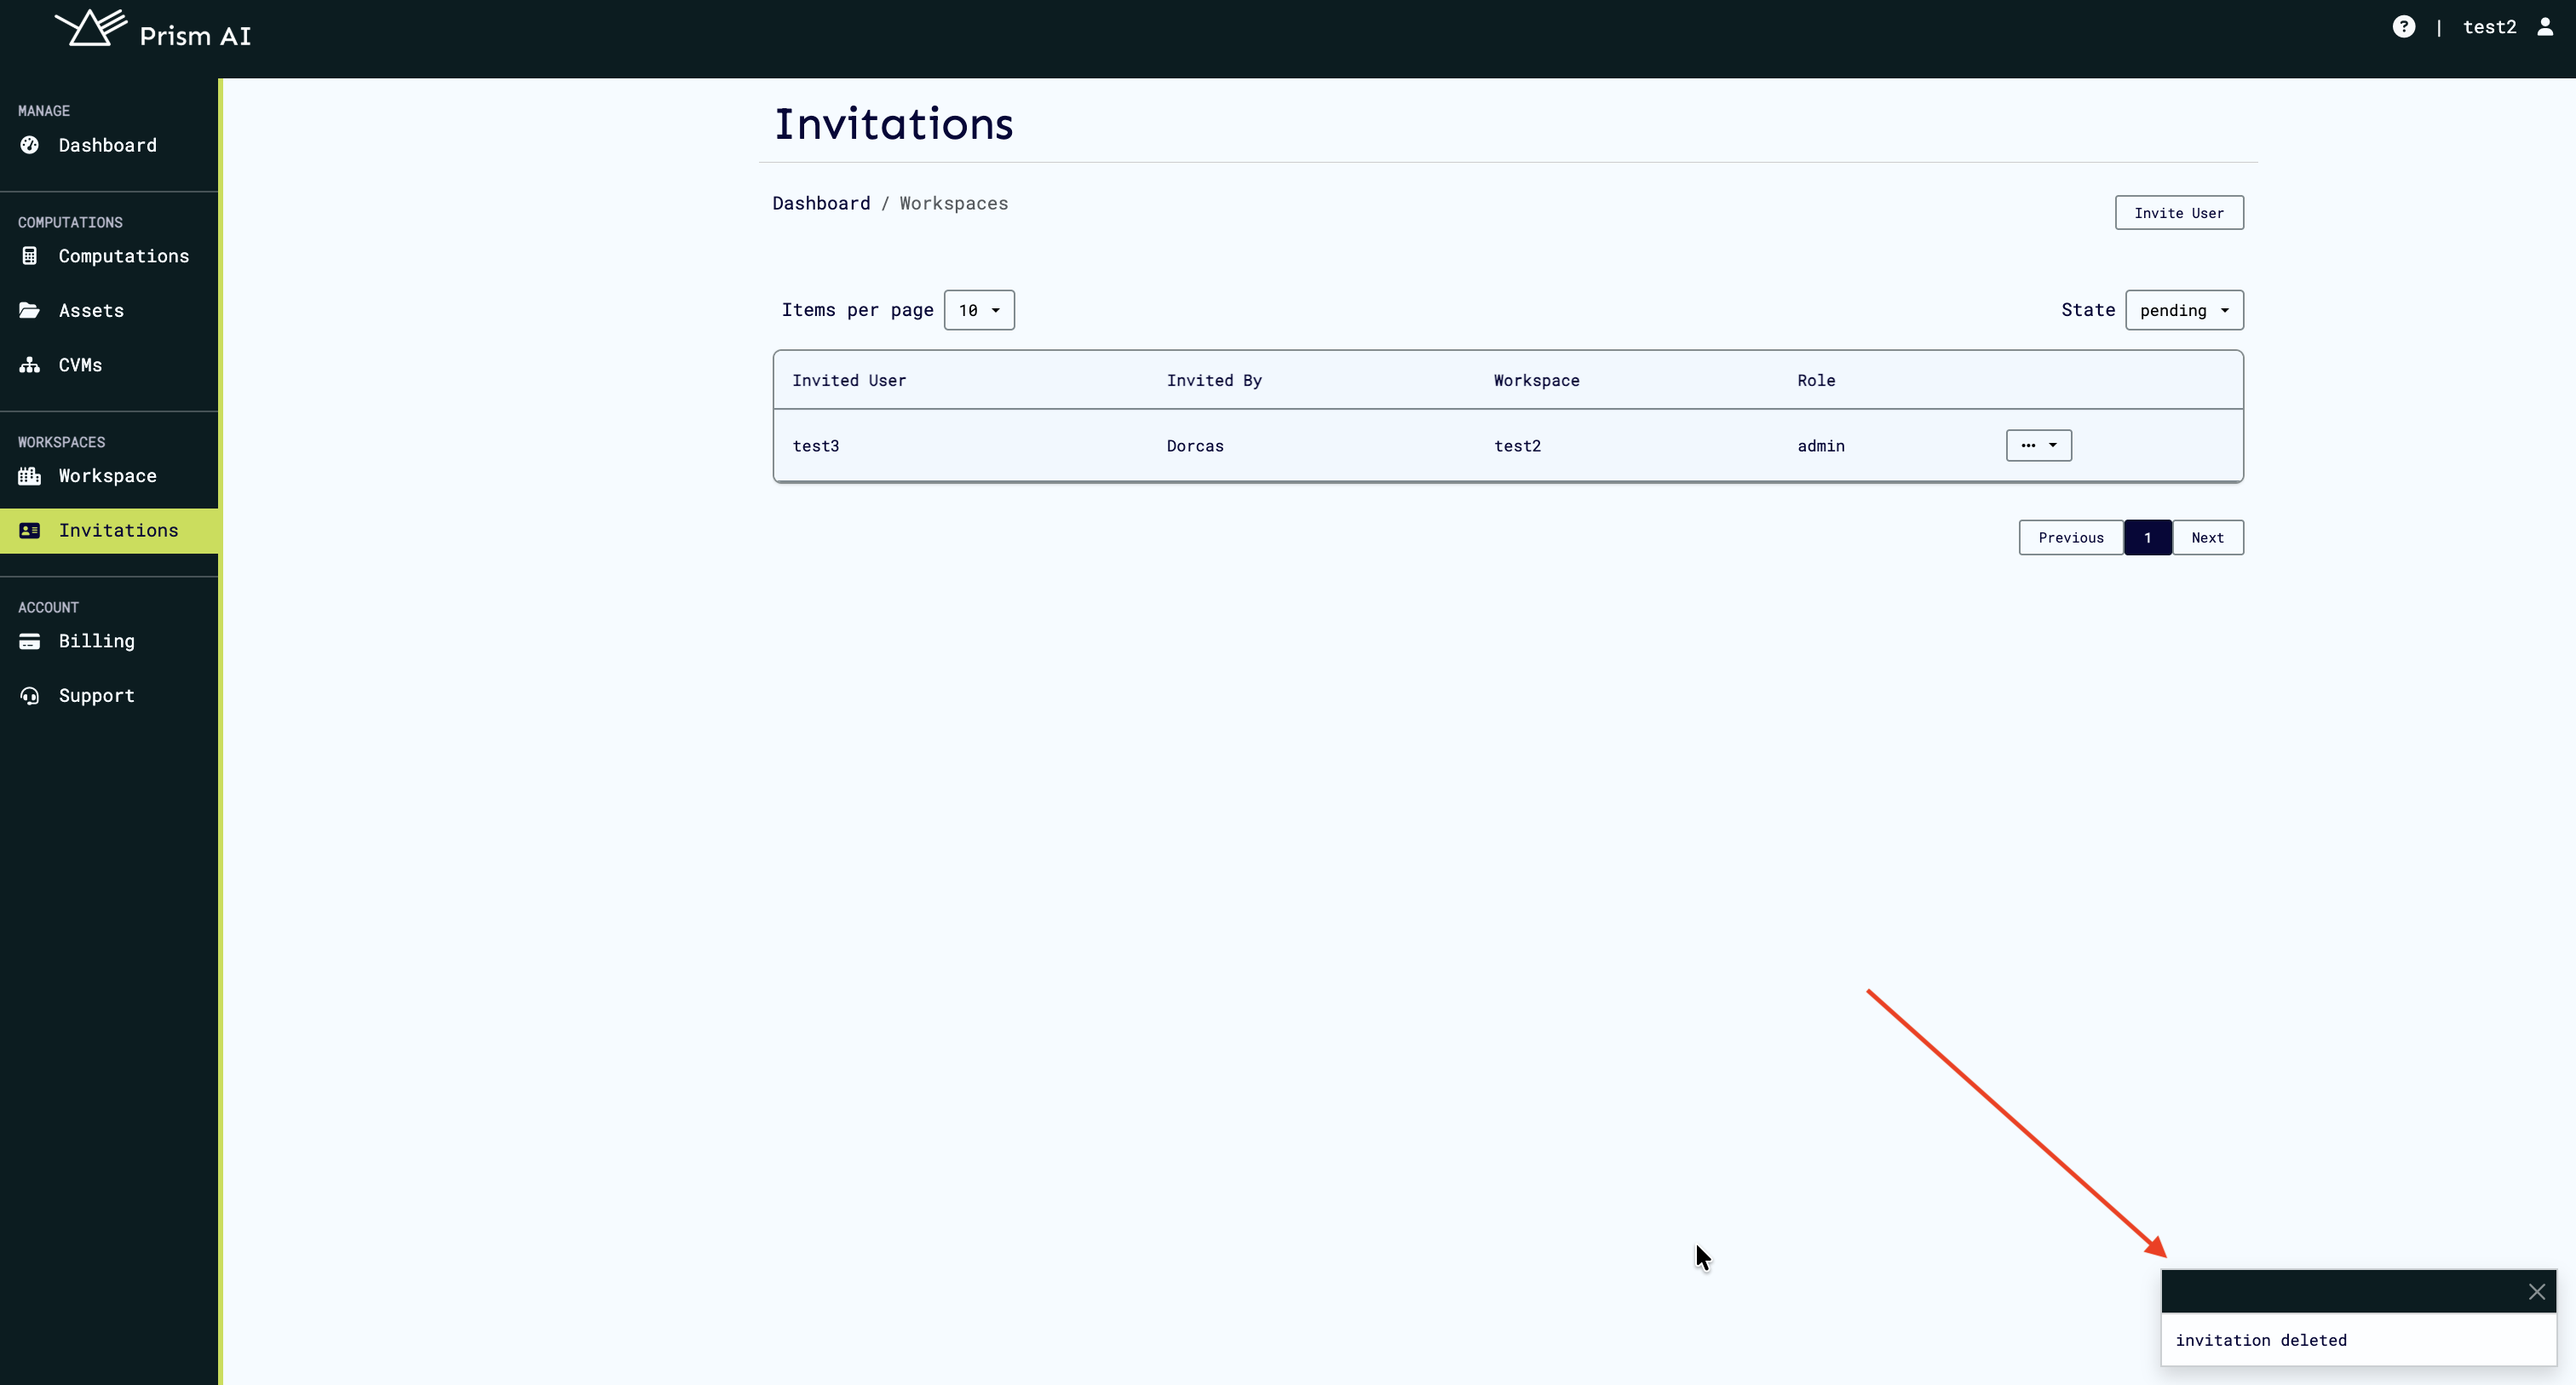
The invitation will be deleted and will be removed from the list.
What happens when you delete:
- The invitation is permanently removed
- The user can no longer accept this invitation
- You can send a new invitation to the same user later if needed
Quick Reference
| Step | Action | Result |
|---|---|---|
| 1 | Admin sends invitation | Status: Pending |
| 2 | User receives notification | Badge appears on Workspaces page |
| 3 | User views invitation | Modal displays invitation details |
| 4 | User accepts/declines | Status updates to Accepted or Rejected |
| 5 | Admin reviews responses | Can filter by status, resend, or delete |